You are about to meet your new favourite weeknight dinner. If you have ever ordered beef and broccoli from a Chinese takeout and thought to yourself that you wish you could make something that good at home without spending an hour in the kitchen, this recipe is your answer. Instant Pot beef and broccoli is tender, saucy, deeply savoury, and ready in a fraction of the time it would take to make a traditional version on the stovetop.
The Instant Pot does something remarkable to cheaper cuts of beef. Cuts that would normally need a long, slow braise to become tender are transformed under pressure into something silky, soft, and almost melt-in-your-mouth in texture, and the sauce that builds up inside the pot during cooking is rich and glossy and clings to every piece of broccoli and beef in the most satisfying way.
In this article, you are going to get the full classic recipe, several delicious variations to try, tips for getting it perfectly right every single time, storage advice, and answers to the questions you probably already have. Everything you need is right here, so let us get straight into it.
Why the Instant Pot Makes This Dish So Good
Beef and broccoli is traditionally a stir fry dish, which means it is cooked fast over very high heat. The stir fry version is excellent but it requires a specific cut of beef, usually a tender and expensive one, and it requires a very hot wok and confident, fast technique. The Instant Pot version takes a completely different approach and the result is arguably even better for a home cook.
Pressure cooking breaks down the connective tissue and muscle fibres in tougher, cheaper cuts of beef in a way that normal cooking cannot achieve in a short time. A cut like chuck steak or flank steak, which would be chewy and tough if you threw it in a quick stir fry, becomes genuinely tender and flavourful after just twelve minutes under pressure in the Instant Pot. The sauce develops a depth and richness from cooking under pressure that a quick stir fry sauce simply does not have time to develop. The broccoli is added at the end after the pressure cooking is done so it stays bright, green, and perfectly cooked rather than going grey and soft. The result is a dish that genuinely rivals restaurant quality and costs a fraction of what takeout would set you back.
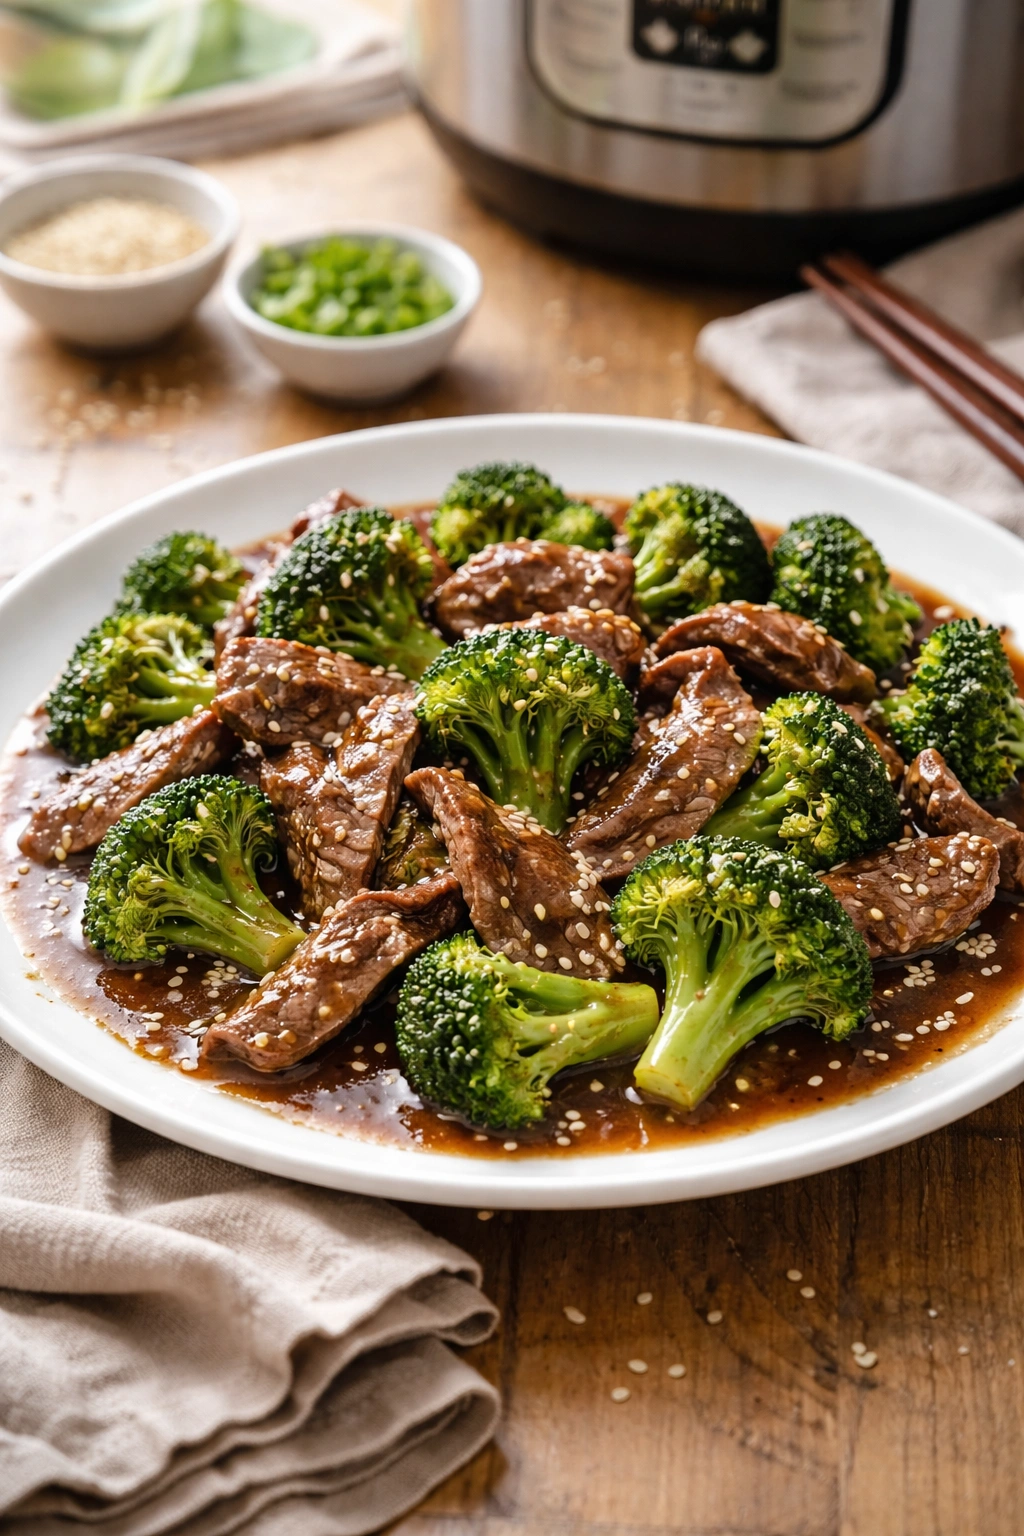
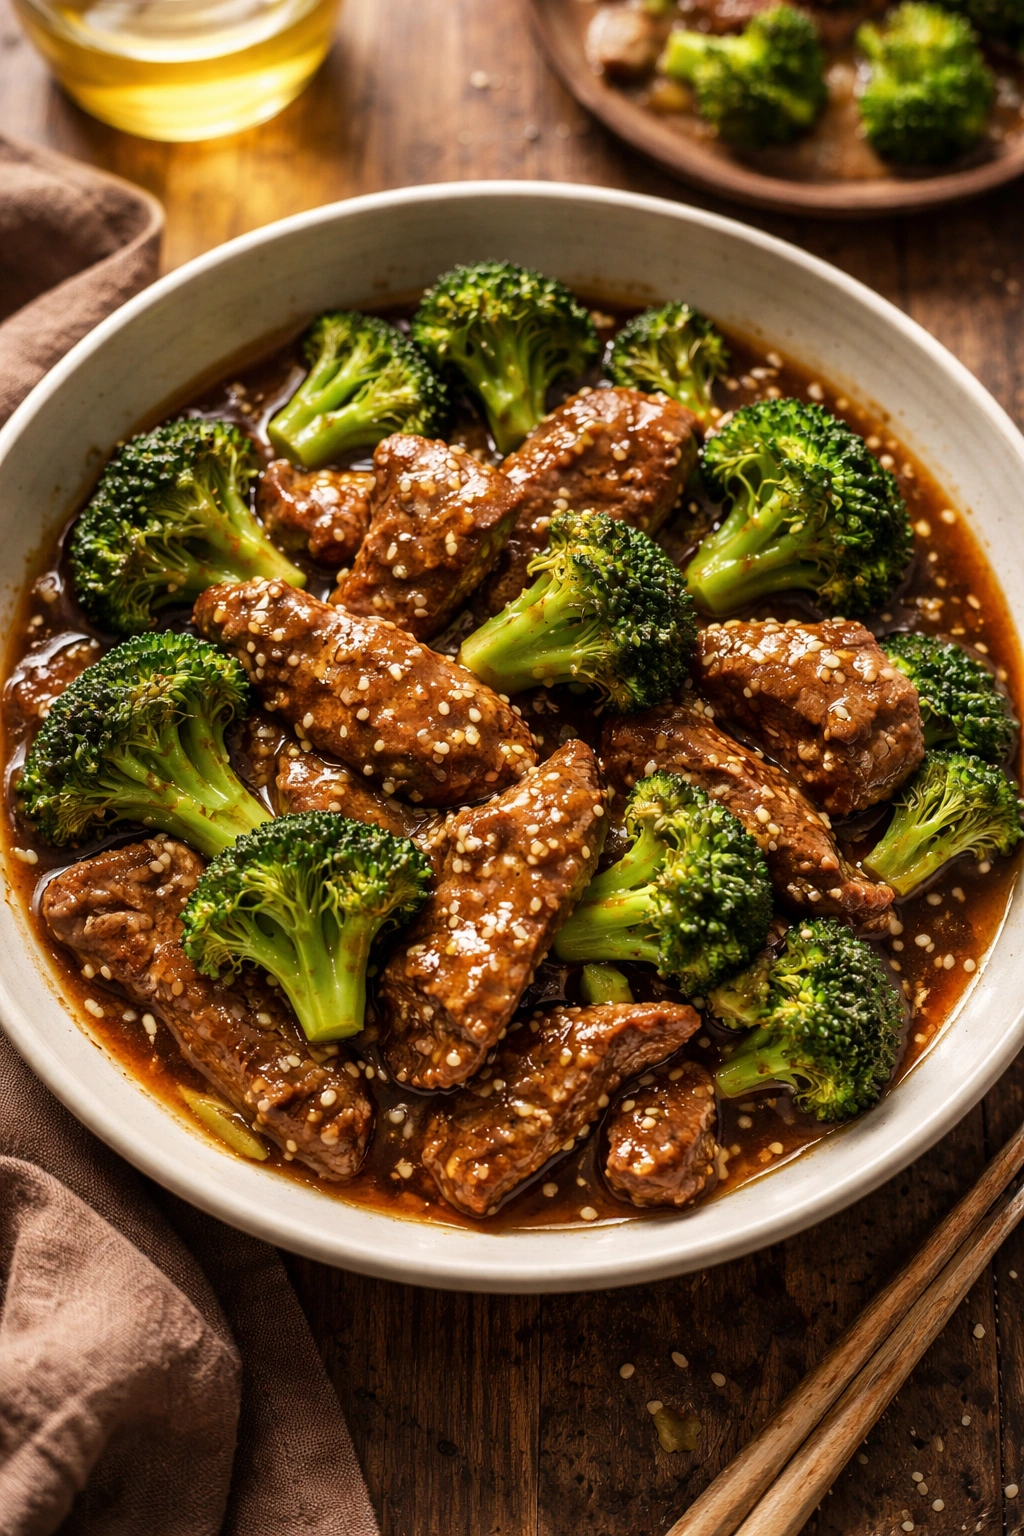
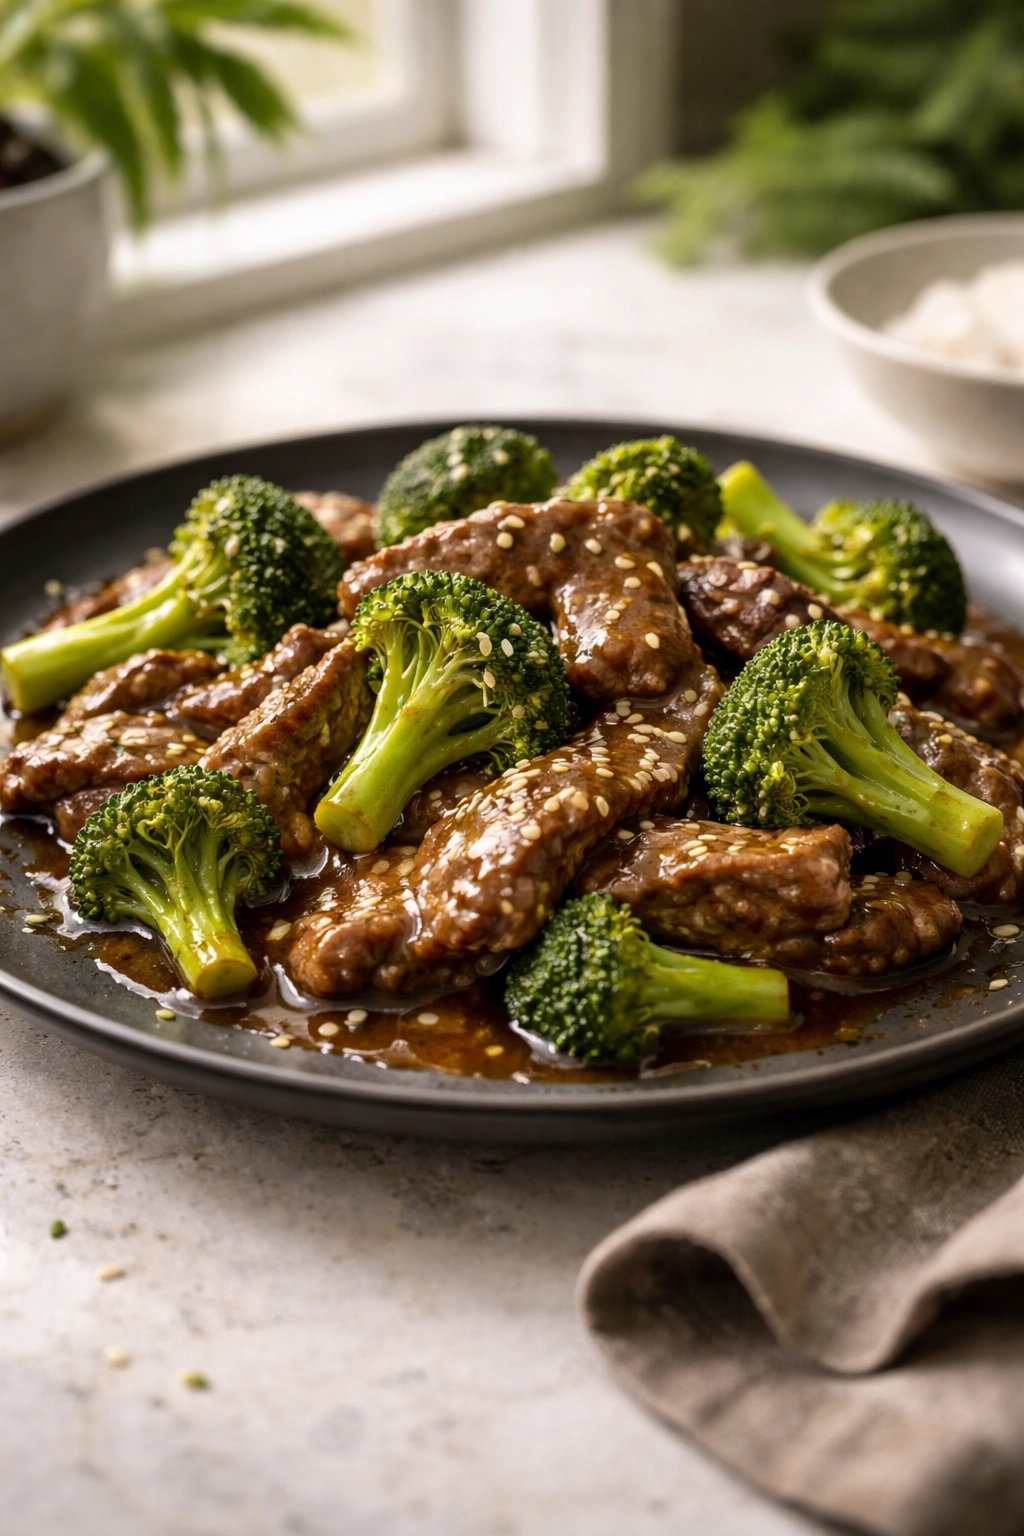
Instant Pot Beef and Broccoli
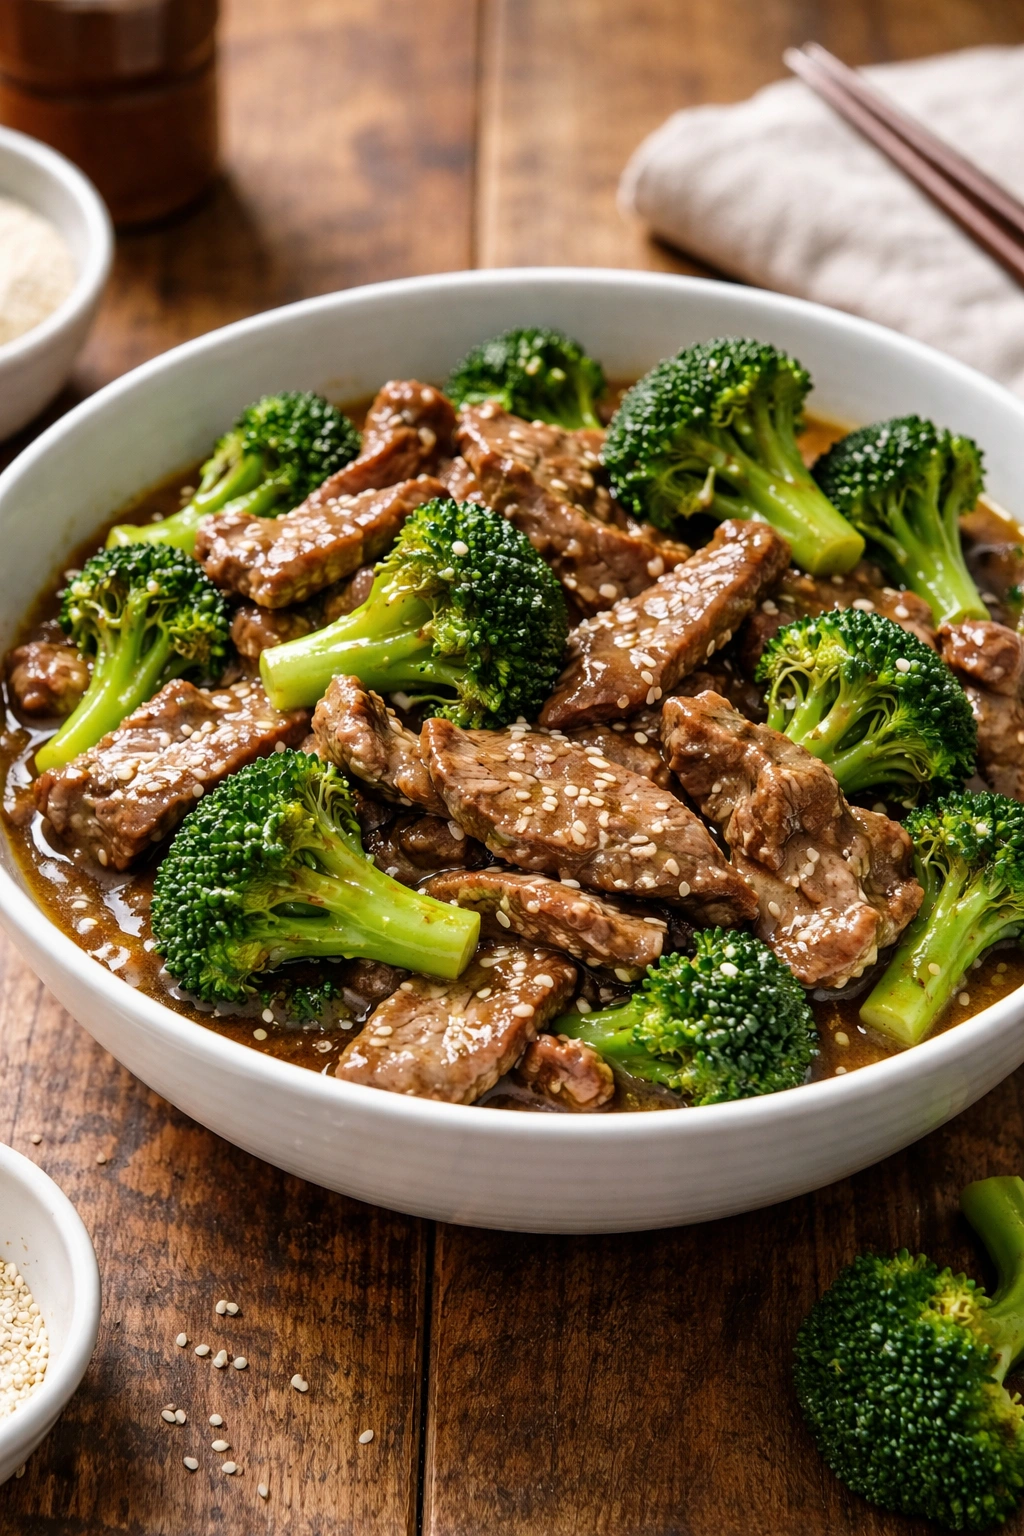
This is the full classic recipe. Everything you need to know to make it perfectly from the very first attempt is right here.
Ingredients
- 700 grams of beef chuck steak or flank steak, sliced thinly against the grain
- 3 cups of fresh broccoli florets, cut into bite-sized pieces
- 4 cloves of garlic, minced
- 1 teaspoon of fresh ginger, grated
- 2 tablespoons of vegetable oil
- 1 tablespoon of cornstarch mixed with 2 tablespoons of cold water, to thicken the sauce
- Steamed white rice or noodles to serve
- Sesame seeds and sliced spring onions for garnish
For the sauce:
- Half a cup of soy sauce, low sodium if preferred
- Quarter cup of beef broth
- 3 tablespoons of brown sugar
- 2 tablespoons of oyster sauce
- 1 tablespoon of sesame oil
- Half a teaspoon of black pepper
- Half a teaspoon of chilli flakes, optional
Cooking Method
Step 1. Start by preparing your beef. Take your chuck steak or flank steak and slice it as thinly as possible against the grain. Slicing against the grain means cutting across the direction that the muscle fibres run rather than parallel to them. When you cut against the grain, each slice has short muscle fibres that are easy to chew. When you cut with the grain, each slice has long fibres that are tough and stringy. If you are not sure which way the grain runs, look at the surface of the meat and you will see faint lines running in one direction. Cut across those lines at a slight angle to get the best texture. For easier slicing, pop the beef in the freezer for fifteen to twenty minutes before cutting. The slight firmness makes it much easier to get clean, even, thin slices.
Step 2. Mix all of your sauce ingredients together in a bowl or measuring jug. Combine the soy sauce, beef broth, brown sugar, oyster sauce, sesame oil, black pepper, and chilli flakes if you are using them. Whisk everything together until the brown sugar is fully dissolved. Taste the sauce at this point. It should be savoury, slightly sweet, and well balanced. Adjust if needed, adding a little more brown sugar if it tastes too salty or a little more soy sauce if it tastes too mild.
Step 3. Set your Instant Pot to the Sauté function and let it heat up for a couple of minutes. Add your vegetable oil and once it is hot, add the garlic and ginger. Stir for about thirty seconds until fragrant. You do not want to sauté them for too long at this stage, just enough to take the raw edge off the garlic and bloom the ginger slightly so they release their aroma.
Step 4. Add the sliced beef to the Instant Pot and spread it out as much as possible. Let it sit for one minute without stirring to get a very light sear on the first side. This step is optional but recommended because it adds a layer of flavour to the beef and the fond that develops on the bottom of the pot becomes part of the sauce. Stir briefly and then pour the sauce over the beef. Stir everything together to make sure the beef is well coated and the sauce covers the bottom of the pot evenly.
Step 5. Cancel the Sauté function. Secure the lid of the Instant Pot and make sure the pressure valve is set to the sealing position. Select the Manual or Pressure Cook function and set the timer for twelve minutes on high pressure. The Instant Pot will take about ten minutes to come up to full pressure before the twelve-minute cooking time actually begins. During this time the machine will hiss and steam slightly, which is completely normal.
Step 6. When the twelve minutes of pressure cooking are done, do a quick pressure release by carefully switching the pressure valve from sealing to venting. Use a long spoon or a folded kitchen towel to protect your hand from the steam, which will be very hot. Once all the steam has released and the float valve has dropped, it is safe to open the lid.
Step 7. Set the Instant Pot back to the Sauté function. The sauce in the pot will be quite thin at this point, which is normal. Pour the cornstarch and water mixture, called a slurry, into the hot sauce while stirring continuously. The sauce will begin to thicken within about two minutes of simmering. Once it has reached a glossy, slightly thick consistency that coats the back of a spoon, it is ready.
Step 8. Add your broccoli florets directly into the pot and stir them through the thickened sauce. Place the lid loosely on top, not sealed, and let the broccoli sit in the hot sauce for three to four minutes. The residual heat will cook the broccoli perfectly. It will be bright green, tender but still with a slight bite, and fully coated in the sauce. Check it after three minutes and if you prefer it a little softer, give it another minute or two.
Step 9. Serve immediately over steamed white rice or noodles. Garnish each bowl generously with sesame seeds and sliced spring onions. Eat it hot while the sauce is still glossy and the broccoli is at its best.
Cooking Tips
Slice your beef against the grain and as thinly as you can. This is the single most important thing you can do to ensure your beef turns out tender rather than chewy. Even with the pressure cooker tenderising the meat, slices that are cut with the grain rather than against it will still have a tougher, more stringy texture. Take the time to look at the grain of the meat before you start cutting and always cut across it. Freezing the beef briefly before slicing makes this step much easier and gives you cleaner, more even slices.
Do not add the broccoli before pressure cooking. This is one of the most common mistakes people make with this recipe and it results in broccoli that is completely overcooked, mushy, grey, and unpleasant. Broccoli cooks very quickly and it cannot withstand twelve minutes of high-pressure cooking. Always add it at the very end, after the pressure cooking is done, and let the residual heat and the hot sauce do the work. Three to four minutes in the hot sauce gives perfectly cooked broccoli every time.
Deglaze the pot after sautéing if you get a burn notice. If your Instant Pot gives you a burn notice before it comes up to pressure, it usually means there is food stuck to the bottom of the pot. Cancel the cooking, open the lid carefully, and add a small splash of broth or water. Use a wooden spoon to scrape up any bits stuck to the bottom, stir, and then restart the pressure cooking. A layer of sauce on the bottom of the pot that is not touching the metal is fine, but actual stuck food can trigger the burn sensor and prevent the pot from coming to pressure.
Use low sodium soy sauce if you are concerned about salt. Regular soy sauce is quite salty and because the sauce reduces and concentrates during pressure cooking, the saltiness intensifies. Low sodium soy sauce gives you more control and you can always add a little more salt at the end if needed. It is much harder to fix an over-salted dish than an under-salted one.
Brown sugar gives a better result than white sugar. Brown sugar has a molasses quality that adds a subtle depth and richness to the sauce that white sugar simply cannot replicate. It also helps the sauce caramelise slightly as it thickens during the sauté phase after pressure cooking, giving it a glossier, more restaurant-quality appearance.
Storage Tips
Instant Pot beef and broccoli stores very well and makes brilliant leftovers that many people actually prefer to the freshly made version because the beef and broccoli absorb even more of the sauce flavour overnight.
Store leftovers in an airtight container in the fridge for up to four days. When reheating, add a small splash of water or beef broth to the container before microwaving to loosen the sauce, which will have thickened considerably as it cooled. Reheat in one-minute intervals in the microwave, stirring between each, until heated through. You can also reheat it gently in a pan on the stove over medium-low heat with a splash of broth.
This dish also freezes well. Store it in freezer-safe airtight containers or zip-lock bags for up to three months. Thaw overnight in the fridge before reheating. The broccoli may be slightly softer after freezing and thawing since vegetables do not freeze as well as meat and sauce, but the flavour will still be excellent. If you are planning to freeze this dish specifically, you can slightly undercook the broccoli before freezing so that it reaches the right texture after reheating rather than ending up overdone.
Instant Pot Beef and Broccoli with Noodles
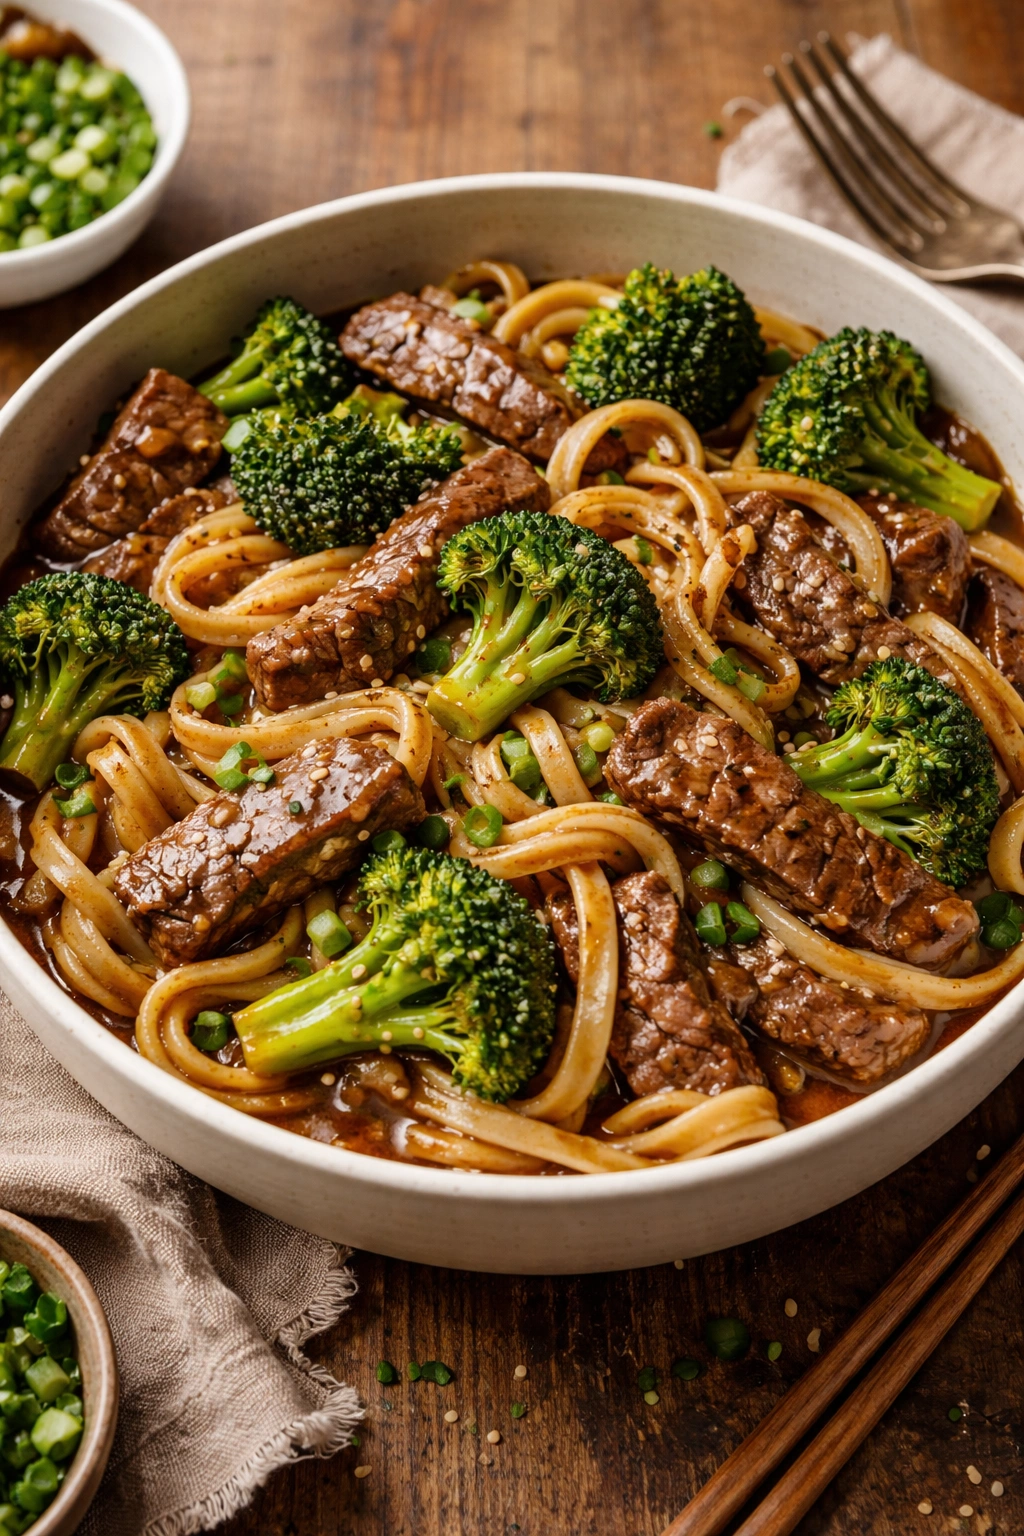
This variation turns the dish into a complete one-pot noodle bowl that is filling, deeply satisfying, and even easier to serve because you do not need to prepare a separate side of rice. The noodles soak up the rich, savoury sauce and give you a very different but equally delicious way to enjoy all the same flavours.
Ingredients
- 700 grams of beef chuck or flank steak, thinly sliced against the grain
- 3 cups of fresh broccoli florets
- 200 grams of dried noodles, udon, lo mein, or thick egg noodles work best
- 4 cloves of garlic, minced
- 1 teaspoon of fresh ginger, grated
- 2 tablespoons of vegetable oil
- 1 tablespoon of cornstarch mixed with 2 tablespoons of cold water
- Spring onions and sesame seeds for garnish
For the sauce:
- Half a cup of soy sauce
- Half a cup of beef broth
- 3 tablespoons of brown sugar
- 2 tablespoons of oyster sauce
- 1 tablespoon of sesame oil
- Half a teaspoon of black pepper
Cooking Method
Follow the base recipe through Steps 1 to 6 exactly. After the quick pressure release and opening the lid, cook the noodles separately in a pot of boiling water according to the package instructions while the Instant Pot is on Sauté and you are thickening the sauce. Once the sauce is thickened, add the broccoli and let it cook for three to four minutes. Drain the noodles and add them directly into the Instant Pot. Toss everything together gently until the noodles are fully coated in the glossy sauce and well combined with the beef and broccoli. Serve directly from the pot into bowls topped with spring onions and sesame seeds.
Helpful Tips
Use a slightly larger amount of broth in the sauce for this variation, as listed above, because the noodles will absorb some of the sauce when they are added and you want enough sauce left to coat everything generously rather than ending up with a dry noodle bowl. Udon noodles are particularly good in this dish because their thick, chewy texture holds up beautifully to the rich sauce and gives you a very satisfying mouthfeel in every bite. If you are using rice noodles, add them very last and toss quickly because they can become mushy if left sitting in hot sauce for too long.
Instant Pot Beef and Broccoli with Mushrooms
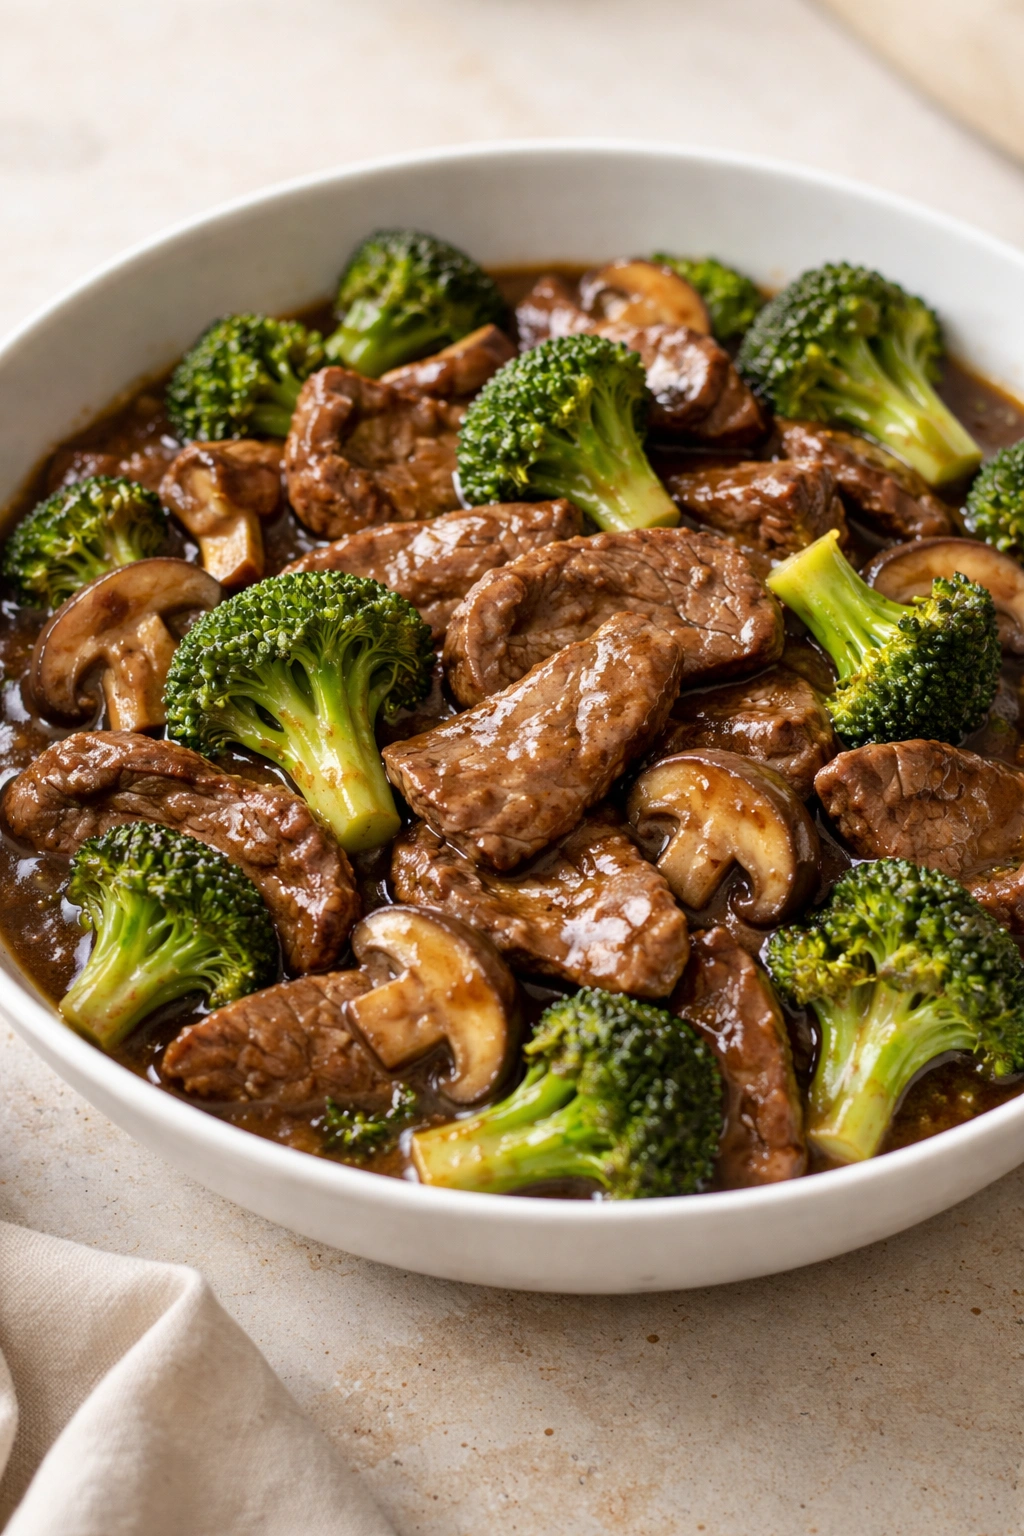
Adding mushrooms to this dish brings an extra layer of earthy, savoury depth that makes the sauce taste even richer and more complex. Mushrooms also have a meaty texture that makes the dish feel more substantial and filling, which is great for people who want to stretch the recipe further without buying more beef.
Ingredients
- 500 grams of beef chuck or flank steak, thinly sliced
- 200 grams of shiitake mushrooms or button mushrooms, sliced
- 3 cups of fresh broccoli florets
- 4 cloves of garlic, minced
- 1 teaspoon of fresh ginger, grated
- 2 tablespoons of vegetable oil
- 1 tablespoon of cornstarch mixed with 2 tablespoons of cold water
- Spring onions and sesame seeds for garnish
For the sauce:
- Half a cup of soy sauce
- Quarter cup of beef broth
- 3 tablespoons of brown sugar
- 2 tablespoons of oyster sauce
- 1 tablespoon of sesame oil
- 1 tablespoon of hoisin sauce
- Half a teaspoon of black pepper
Cooking Method
Follow the base recipe through the sauté stage. When you add the beef to the pot in Step 4, also add the sliced mushrooms and stir everything together before pouring in the sauce. The mushrooms cook beautifully under pressure alongside the beef and absorb the sauce deeply, becoming incredibly flavourful and tender. The hoisin sauce added to this variation’s sauce list complements the mushrooms perfectly and adds a slightly sweet, plummy depth that works wonderfully with the shiitake. Follow all remaining steps as per the base recipe, adding the broccoli at the end after pressure cooking is complete.
Helpful Tips
Shiitake mushrooms are the best choice for this variation because they have a naturally meaty, earthy, slightly smoky flavour that pairs incredibly well with beef and the savoury soy-based sauce. Button mushrooms work as a more mild and accessible alternative. If using shiitake, remove the tough stems before slicing since they are too fibrous to eat pleasantly but can be saved and added to a broth or stock for extra flavour.
Instant Pot Beef and Broccoli with Carrots and Bell Pepper
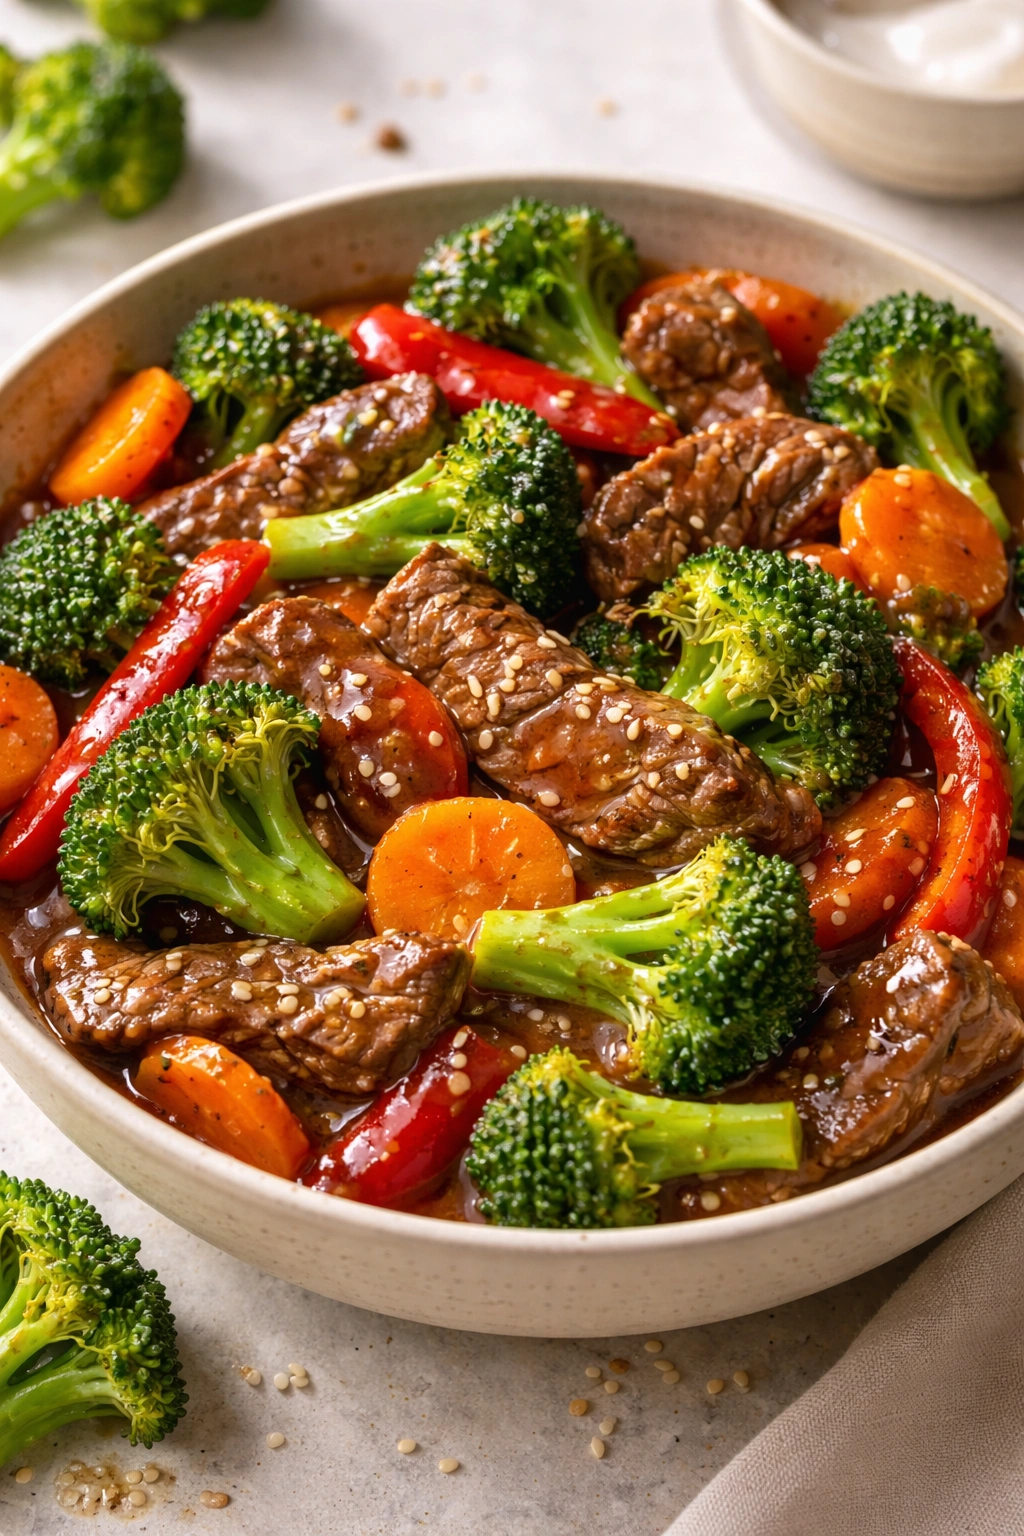
This is the version to make when you want a more colourful, vegetable-packed bowl that feels as nutritious as it is delicious. Adding carrots and bell pepper to the mix brings sweetness, colour, and extra texture that makes this dish feel more like a complete, well-rounded meal rather than just a protein and one vegetable.
Ingredients
- 700 grams of beef chuck or flank steak, thinly sliced
- 2 cups of fresh broccoli florets
- 2 medium carrots, peeled and sliced diagonally into thin coins
- 1 red bell pepper, sliced into strips
- 4 cloves of garlic, minced
- 1 teaspoon of fresh ginger, grated
- 2 tablespoons of vegetable oil
- 1 tablespoon of cornstarch mixed with 2 tablespoons of cold water
- Spring onions and sesame seeds for garnish
For the sauce:
- Half a cup of soy sauce
- Quarter cup of beef broth
- 3 tablespoons of brown sugar
- 2 tablespoons of oyster sauce
- 1 tablespoon of sesame oil
- Half a teaspoon of black pepper
- Half a teaspoon of chilli flakes
Cooking Method
Follow the base recipe through all the pressure cooking steps with the beef. After the quick release and sauce thickening stage, add the carrots to the sauce first since they take slightly longer to cook than broccoli and bell pepper. Stir them in and put the lid on loosely for two minutes. Then add the broccoli florets and bell pepper strips, stir everything together, and replace the lid loosely for another three to four minutes until all the vegetables are tender but still holding their shape and colour. Taste the sauce, adjust seasoning, and serve over steamed rice with sesame seeds and spring onions.
Helpful Tips
Slicing the carrots diagonally into thin coins rather than cutting them into thick rounds gives them a larger surface area and helps them cook more quickly in the residual heat of the sauce. Thick carrot pieces will still be slightly firm and underdone by the time the broccoli is ready. If you prefer your vegetables with a little more bite, reduce the time with the lid on to two minutes rather than three to four. If you prefer them softer, give it an extra minute or two with the lid on.
Instant Pot Beef and Broccoli with Honey Garlic Sauce
This variation swaps the standard brown sugar sweetness in the sauce for honey, which gives the dish a slightly different quality of sweetness that is floral, more fragrant, and slightly stickier. Combined with extra garlic and a touch of rice vinegar for brightness, this honey garlic version has a more vibrant, punchy flavour that a lot of people find even more addictive than the classic.
Ingredients
- 700 grams of beef chuck or flank steak, thinly sliced
- 3 cups of fresh broccoli florets
- 5 cloves of garlic, minced
- 1 teaspoon of fresh ginger, grated
- 2 tablespoons of vegetable oil
- 1 tablespoon of cornstarch mixed with 2 tablespoons of cold water
- Spring onions and sesame seeds for garnish
For the honey garlic sauce:
- Half a cup of soy sauce
- Quarter cup of beef broth
- 3 tablespoons of honey
- 2 tablespoons of oyster sauce
- 1 tablespoon of rice vinegar
- 1 tablespoon of sesame oil
- Half a teaspoon of black pepper
Cooking Method
The method is identical to the base recipe in every step. The only differences are in the sauce composition itself, where honey replaces the brown sugar and rice vinegar is added for brightness, and the slightly higher amount of garlic which intensifies the garlic flavour throughout the dish. The honey gives the finished sauce a beautiful gloss and a slightly stickier quality that clings to the beef and broccoli wonderfully. Follow all steps exactly as written in the base recipe.
Helpful Tips
Honey can sometimes make a sauce thicken more quickly during the sauté phase after pressure cooking, so keep a close eye on it when you add the cornstarch slurry and stir continuously. If it thickens faster than you expect, add a small splash of broth or water immediately to loosen it before it becomes too thick. The rice vinegar in this variation is a small but important addition. It brightens all the other flavours and prevents the sauce from tasting flat or one-dimensional despite the richness of the honey and soy. Do not skip it.
Additional Helpful Information About Instant Pot Beef and Broccoli

There are a few more things worth understanding about this dish before you dive in, especially if this is your first time cooking beef and broccoli in an Instant Pot.
The Best Cuts of Beef to Use
Not all cuts of beef work equally well in this recipe, and choosing the right one makes a significant difference to the final result. Chuck steak is the top recommendation for Instant Pot beef and broccoli. It is an affordable cut that has enough connective tissue and marbling to become beautifully tender under pressure while developing a rich, deep flavour that cheaper lean cuts simply cannot match. Flank steak is another excellent option that is slightly leaner than chuck and has a more pronounced beef flavour. It slices very cleanly against the grain and becomes tender quickly under pressure.
Sirloin steak works but it is a more expensive cut that does not need pressure cooking to be tender, so you are somewhat wasting the advantage of the Instant Pot if you use it here. Ribeye is another premium cut that is better suited to a quick sear or a grill. For this specific recipe, chuck steak or flank steak give you the best value for money and the best overall result.
How to Adjust the Sauce to Your Personal Taste
The beauty of making this dish at home rather than ordering it is that you have complete control over how the sauce tastes. If you prefer a saltier sauce, increase the soy sauce by one to two tablespoons. If you want it sweeter, add an extra tablespoon of brown sugar or honey. If you want more heat, increase the chilli flakes or add a teaspoon of chilli garlic sauce or sriracha to the sauce mixture. If you want a deeper, more complex flavour, a tablespoon of hoisin sauce or a teaspoon of dark soy sauce added to the sauce will give it a richer, slightly more intense quality. The base recipe is designed to be a balanced starting point, but your personal taste should always be the final guide.
Can You Make This Without an Instant Pot
Yes, you can make a very similar version of this dish using a regular pot or deep skillet on the stovetop. The main difference is that you will need to use a more tender cut of beef like sirloin or ribeye rather than chuck, because you will not have the pressure cooking to tenderise a tougher cut. Slice the beef thinly, sear it quickly in a hot pan, set it aside, cook the garlic and ginger, add the sauce ingredients, bring to a simmer, and thicken with the cornstarch slurry. Add the beef back in and stir to coat, then add the broccoli and cook for three to four minutes until tender. The whole stovetop version takes about twenty minutes with a tender cut of beef and is an excellent alternative if you do not own an Instant Pot.
Frequently Asked Questions

Why did my Instant Pot give me a burn notice during this recipe?
A burn notice usually happens when there is not enough liquid in the pot or when something is stuck and scorched on the bottom. This can happen if the soy sauce caramelises onto the bottom during the sauté stage before enough liquid is added. To prevent this, make sure you deglaze the pot after sautéing the garlic and ginger by pouring in a splash of the beef broth and scraping up any stuck bits before adding the rest of the sauce and the beef. Always make sure the total amount of liquid in the pot meets your Instant Pot’s minimum liquid requirement, which is usually at least one cup for most models.
Can I use frozen beef in this recipe?
You can use beef that is partially thawed but cooking from completely frozen is not recommended for this recipe because frozen beef releases a lot of water as it cooks, which dilutes the sauce significantly and prevents the beef from developing any colour during the sauté step. Thaw your beef in the fridge overnight before making this recipe for the best result. If you are in a hurry, thaw the beef in cold water in its packaging for thirty to forty minutes, which is usually enough to make it sliceable and ready to cook.
How do I know if my beef is cooked safely after pressure cooking?
After twelve minutes on high pressure in the Instant Pot, your beef will be fully cooked and safe to eat regardless of the cut or thickness. Pressure cooking reaches temperatures that exceed standard safe cooking temperatures for beef, so food safety is not a concern at this time and pressure level. The beef should be tender, easily pulled apart, and fully opaque throughout with no raw appearance remaining. If you find any pieces that seem underdone after opening the pot, simply use the Sauté function to cook them for an additional few minutes in the hot sauce.
Can I double this recipe in the Instant Pot?
Yes, you can double the recipe as long as you do not exceed the maximum fill line of your Instant Pot, which is usually two thirds of the pot’s total capacity. When doubling, keep the pressure cooking time the same at twelve minutes. The Instant Pot will take longer to come to pressure with more food inside, but the actual cooking time remains the same. The sauce thickening step may take a minute or two longer with a larger quantity of sauce, so just keep stirring until it reaches the right consistency. Add the broccoli in two batches if necessary to make sure it all fits and cooks evenly in the hot sauce.
Is there a way to make this recipe gluten-free?
Yes, with two simple swaps the entire recipe becomes gluten-free. Replace the regular soy sauce with tamari, which is a Japanese soy sauce that is typically brewed without wheat and is widely available in most supermarkets. Replace the oyster sauce with a certified gluten-free oyster sauce, which is available in most Asian grocery stores and increasingly in mainstream supermarkets as well. All other ingredients in the recipe are naturally gluten-free. Always check the labels of any store-bought sauces or condiments carefully since manufacturing processes vary between brands and some do contain hidden gluten-containing ingredients.
Final Thought
Instant Pot beef and broccoli is one of those recipes that genuinely delivers on every promise it makes. It is faster than takeout, cheaper than takeout, more nutritious than takeout, and honestly tastes better than most takeout versions because you are in complete control of every flavour in the sauce and you know exactly what has gone into it. The Instant Pot does the heavy lifting with the beef, transforming an affordable, accessible cut into something tender and flavourful that would take hours to achieve any other way.
Whether you stick with the classic recipe or explore the noodle version, the mushroom variation, the honey garlic sauce, or the colourful vegetable-packed bowl, every single option delivers that same deep, savoury, glossy, satisfying result that makes this dish so endlessly craveable. The core technique never changes across any of the variations. Pressure cook the beef in the sauce, thicken the sauce on Sauté, and finish the broccoli in the residual heat at the very end. Get those three steps right every time and your Instant Pot beef and broccoli will come out perfectly, consistently, and with very little effort every single time you make it.
Make it this week over a big bowl of steamed rice, serve it to your family or your friends, and watch how quickly the pot empties. Once this recipe is in your regular rotation, the temptation to order beef and broccoli for delivery is going to feel much less urgent, and that is exactly the sign of a truly great homemade recipe.
Recipes Ideas:
Coconut Curry Chicken With Rice Noodles
If there is one recipe that I genuinely get excited about every single tim...Slow Cooker Chicken and Sweet Potato Curry Meal
Get ready, because this recipe right here is about to become one of the mo...Brown Butter Sage Butternut Squash Pasta
Okay, if you have been looking for a pasta recipe that feels like a warm h...Quick Dinner Recipes In 20 Minutes
Raise your hand if you have ever come home after a long day, opened the fr...Asian Sesame Noodles Dish
Hey friend, welcome back to my recipe blog! If you are looking for a recip...Dirty Rice with Ground Beef Recipe
You know those recipes that sound simple but taste like you spent all day ...Thai Shrimp Fried Rice Recipe
Today, I am sharing with you a Thai Shrimp Fried Rice recipe that is going...