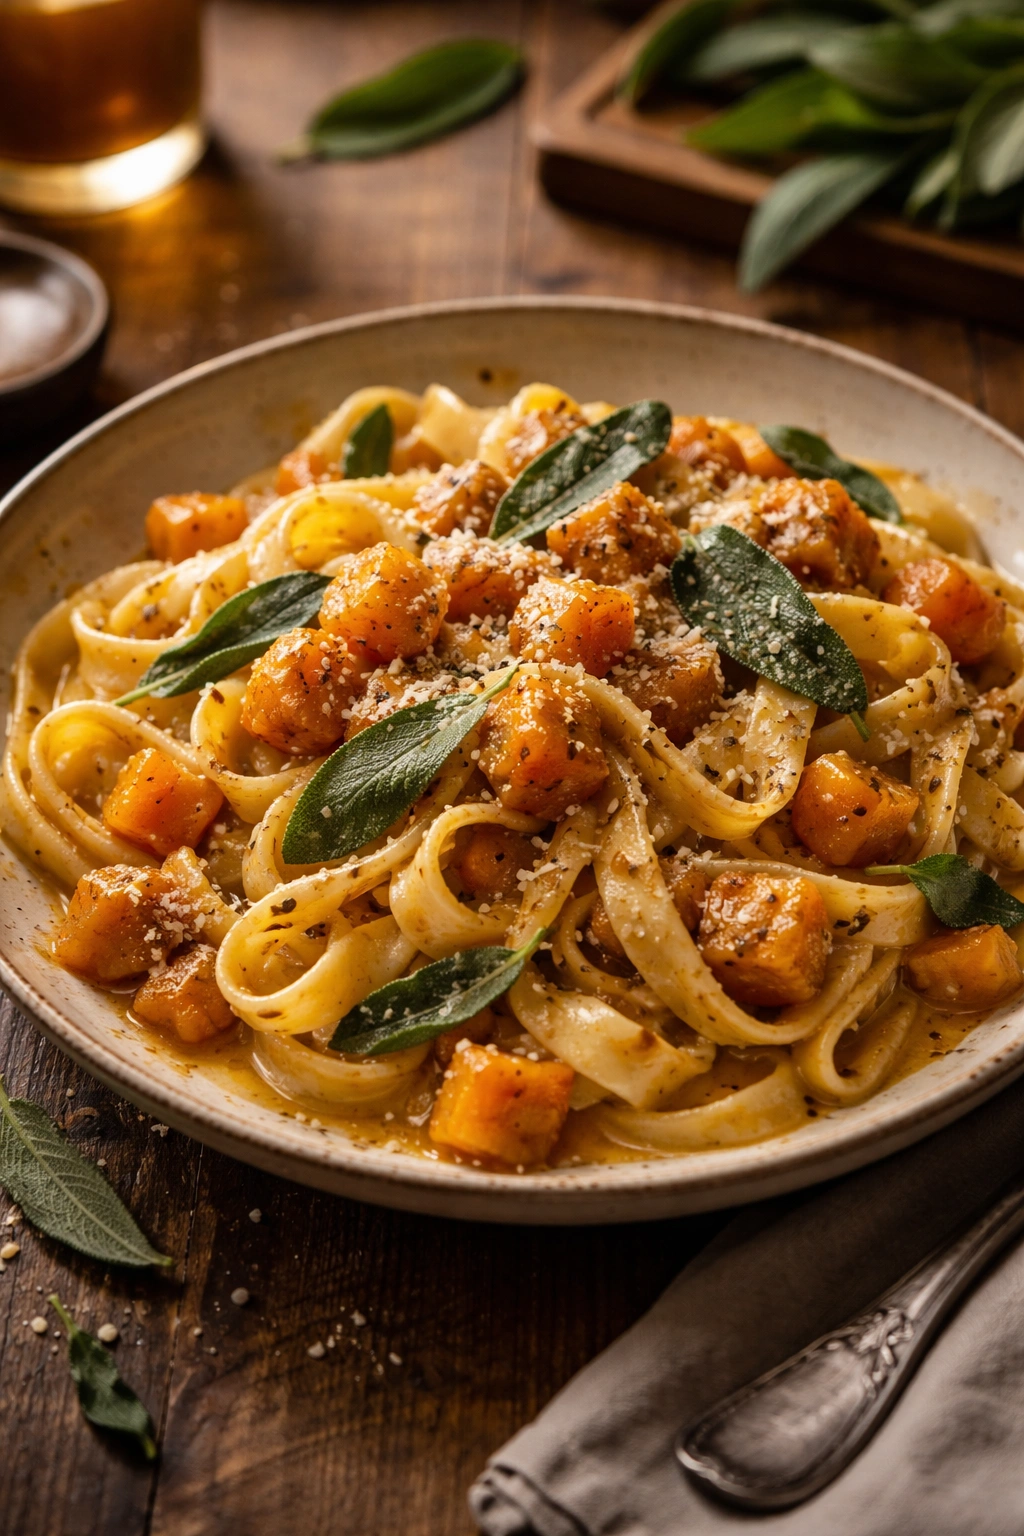
Okay, if you have been looking for a pasta recipe that feels like a warm hug on a cold evening, you have just found it. Brown butter sage butternut squash pasta is one of those dishes that sounds fancy, looks absolutely stunning in the bowl, and tastes like something a professional chef spent hours creating, but the truth is that you can have it ready in about forty minutes with ingredients that are not hard to find and steps that anyone can follow confidently.
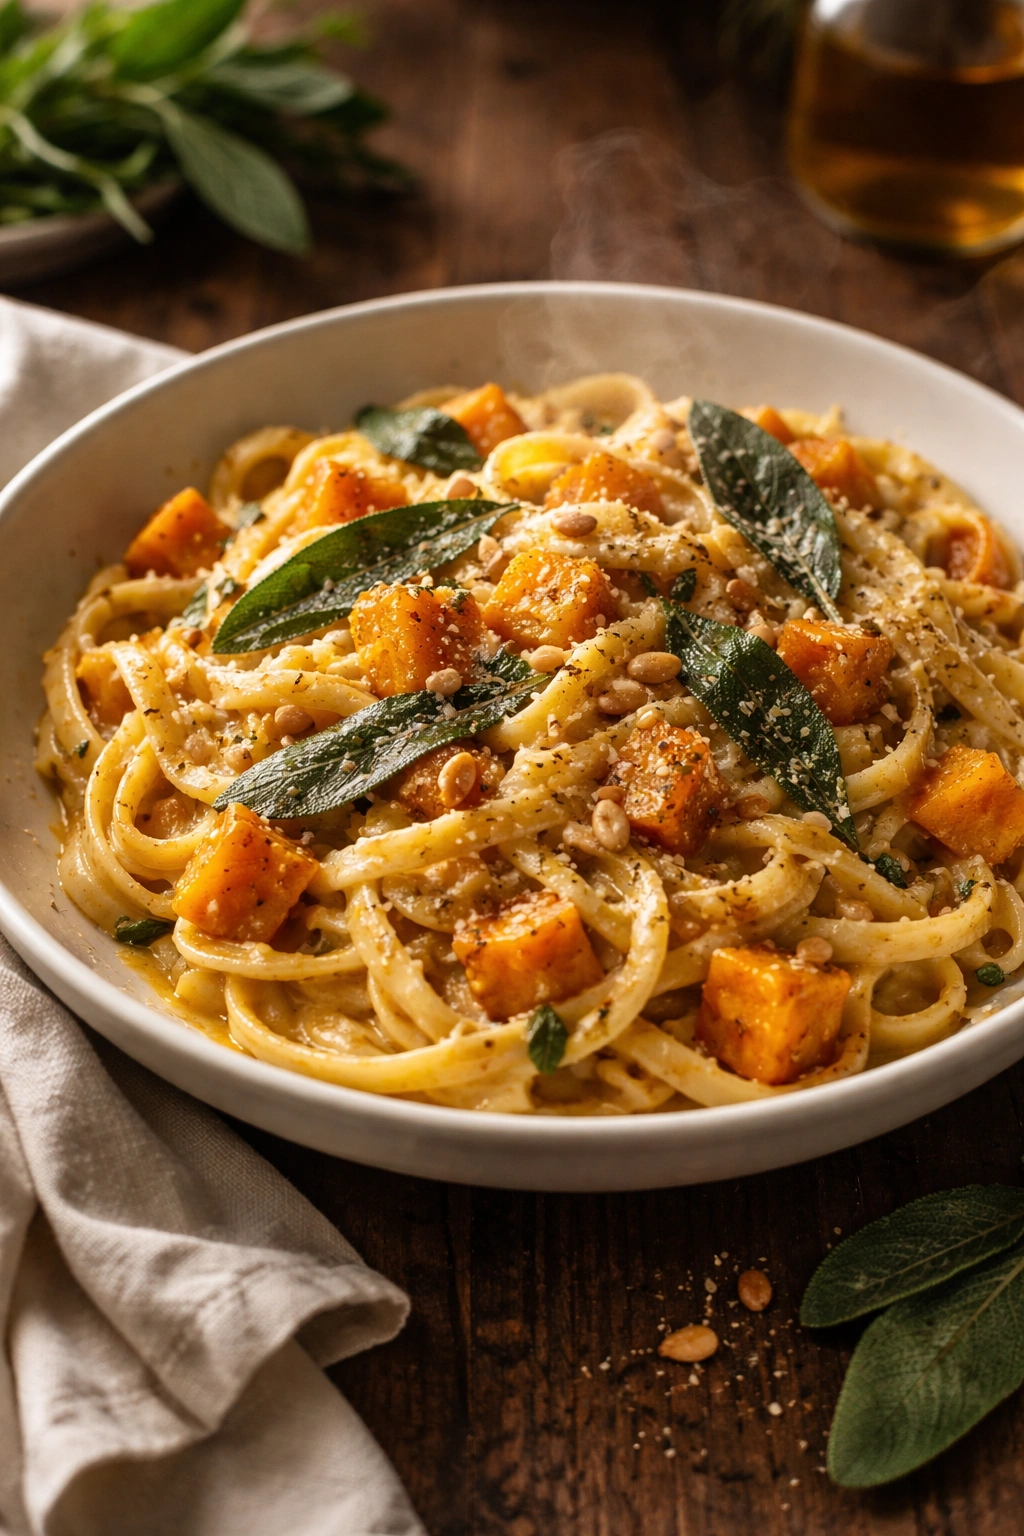
This pasta brings together three things that were practically made for each other. Nutty, golden brown butter that smells like toasted hazelnuts. Crispy fried sage leaves that turn deep green and earthy in the pan. And sweet, velvety roasted butternut squash that gets blended into the most gorgeous, silky sauce you have ever tossed pasta through. Together they create something that is rich without being heavy, comforting without being plain, and impressive without being complicated.
In this article, you will get the full classic recipe, multiple variations to suit different tastes and dietary needs, detailed cooking tips, storage advice, and answers to the questions you are probably already thinking about. Everything you need is right here, so let us get straight into it.
Why This Pasta Stands Out from the Rest
Most pasta dishes lean on either a tomato-based sauce or a heavy cream sauce. This one does something more interesting and, honestly, more rewarding. The sauce in this recipe is built from roasted butternut squash that has been blended until completely smooth and creamy, finished with brown butter that has been cooked just past melting point until it turns golden and develops a deep, nutty aroma, and brought together with starchy pasta water that makes everything silky and glossy in a way that feels genuinely luxurious.
What makes it special is the technique of browning the butter. Regular melted butter is fine. Brown butter is extraordinary. When you cook butter past the melting stage and let it sit over medium heat until the milk solids in the butter turn golden and begin to caramelise, the entire character of the butter changes. It develops hundreds of new flavour compounds that give it a rich, toasty, nutty quality that is almost impossible to replicate any other way. That flavour is what makes this pasta taste so deeply satisfying, and once you learn how to make brown butter properly, you will find yourself using it in everything.
Brown Butter Sage Butternut Squash Pasta
This is the full classic recipe. Everything you need to make it perfectly the very first time is right here, broken down step by step with nothing left out.
Ingredients
- 400 grams of pasta, rigatoni, pappardelle, fettuccine, or penne all work beautifully
- 1 medium butternut squash, peeled, deseeded, and cut into roughly 2-centimetre cubes
- 100 grams of unsalted butter
- 12 to 15 fresh sage leaves
- 4 cloves of garlic, minced
- Half a cup of pasta cooking water, reserved before draining
- Half a cup of freshly grated Parmesan cheese, plus more for serving
- 2 tablespoons of olive oil for roasting
- Half a teaspoon of ground nutmeg
- Half a teaspoon of smoked paprika
- Salt and black pepper to taste
- A pinch of chilli flakes, optional but highly recommended
Cooking Method
Step 1. Preheat your oven to 200 degrees Celsius or 400 degrees Fahrenheit. Peel your butternut squash, scoop out the seeds with a spoon, and cut the flesh into evenly sized cubes of roughly two centimetres each. Spread the cubes out on a large lined baking tray in a single layer with visible space between each piece. Drizzle the olive oil over the squash and season generously with salt, black pepper, smoked paprika, and nutmeg. Toss everything together with your hands until every piece is well coated. Place the tray in the preheated oven and roast for twenty-five to thirty minutes, turning the pieces over halfway through, until the squash is completely tender inside and golden with slightly caramelised edges on the outside. That caramelisation on the edges is where so much of the flavour lives, so do not pull the tray out early.
Step 2. While the squash is roasting, bring a large pot of water to a full boil. Season the water very generously with salt. It should taste almost like mild seawater. This is how pasta gets flavoured from the inside out during cooking. Add your pasta and cook it according to the package instructions until it is al dente, which means it still has a very slight firmness when you bite through it and is not fully soft all the way through. Before you drain the pasta, scoop out at least half a cup of the starchy cooking water and set it aside in a cup or bowl. This water is going to be one of the most important ingredients in your sauce, so do not skip this step.
Step 3. When your squash comes out of the oven, transfer approximately two thirds of it into a blender or food processor. Add two to three tablespoons of your reserved pasta water and blend until completely smooth, creamy, and velvety with no lumps remaining. Set the remaining one third of roasted squash aside as whole pieces. These will be folded through the finished pasta at the end to give you pockets of soft, caramelised squash throughout every bowl, which adds both texture and visual interest to the dish.
Step 4. Now comes the step that makes this entire recipe what it is. Making the brown butter. Place your unsalted butter in a light-coloured pan or skillet over medium heat. Using a light-coloured pan is important because it allows you to see the colour of the butter clearly as it changes, so you can judge when it is exactly right without going too far. As the butter melts, it will start to foam on the surface. Keep swirling the pan gently and watching it carefully. After about three to four minutes, the foam will begin to settle, the butter will shift from yellow to a light golden colour, and small brown specks will appear on the bottom of the pan. At the same time, a deeply nutty, toasty aroma will fill the kitchen. That smell and that colour are your signals. The brown butter is ready.
Step 5. The moment your butter is ready, add the fresh sage leaves directly to the pan. They will sizzle and crackle loudly, which is exactly what should happen. Fry them in the brown butter for thirty seconds to one minute, moving them gently with a spoon, until they have gone crispy and turned a deeper, darker green. Lift them out with a slotted spoon and lay them on a piece of paper towel to drain. They will continue to crisp up further as they cool and will be your main garnish. Add the minced garlic to the brown butter still in the pan and cook for one minute, stirring constantly so it does not burn.
Step 6. Pour the blended butternut squash sauce into the pan with the brown butter and garlic. Stir everything together over medium-low heat until they are fully combined into a unified, golden sauce. Add your reserved pasta water a little at a time, stirring between additions, until the sauce reaches a smooth, flowing consistency that will coat pasta easily without being too thick and heavy or too thin and watery. Add your grated Parmesan and stir it in until fully melted and incorporated into the sauce.
Step 7. Drain your pasta and add it directly into the sauce pan. Toss everything together thoroughly until every piece of pasta is coated in the golden squash sauce. Add the reserved whole roasted squash pieces and fold them in gently so they stay intact rather than breaking apart completely. Taste the finished dish and adjust the seasoning with more salt, black pepper, or chilli flakes as needed. Serve immediately in warm bowls topped with the crispy fried sage leaves, an extra grating of Parmesan, and a small drizzle of good quality olive oil if you have it.
Cooking Tips
Never walk away from your brown butter. This is the single most important instruction in the entire recipe. Brown butter can go from perfectly golden and nutty to dark, bitter, and burnt in the space of about thirty seconds. Once the butter starts to change colour, give it your complete and undivided attention. Keep swirling the pan, keep watching the colour, and be ready to act the moment it hits that golden brown stage with visible brown specks and that unmistakable nutty aroma. A light-coloured pan is not optional here, it is genuinely essential so you can see what is happening clearly.
Give the squash room to roast properly. Butternut squash, like most vegetables, needs space between each piece in the oven to roast and caramelise rather than steam. When pieces are crowded together on the tray, they trap moisture against each other and go soft and pale all over instead of developing that golden, slightly crispy exterior that adds so much flavour. If your tray feels crowded, use two trays rather than trying to squeeze everything onto one.
Always save your pasta water before draining. The starchy water that pasta cooks in is genuinely irreplaceable in this recipe. The starch it contains helps the sauce emulsify into a glossy, smooth coating that clings to the pasta beautifully. Plain tap water does not have the same effect and the sauce will be noticeably less silky and cohesive without it. Set a reminder if you need to, but do not forget this step.
Season generously at every stage. Season the squash before roasting, season the pasta water until it tastes like mild seawater, taste the sauce before adding the pasta, and taste again after everything is combined. Layered seasoning is what creates a dish that tastes fully developed and satisfying from the first bite rather than one that tastes flat or one-dimensional.
Use freshly grated Parmesan, not the pre-grated kind from a shaker. Pre-grated Parmesan from a shaker has a dry, powdery texture and a much weaker flavour than cheese you grate yourself fresh from the block. It also does not melt smoothly into sauces. Freshly grated Parmesan melts into the warm squash sauce silkily and adds a genuine salty, nutty depth that pre-grated simply cannot match.
Storage Tips
This pasta is at its absolute best eaten fresh and hot straight from the pan. The crispy sage leaves will soften as they sit, and the pasta will absorb the sauce over time, making it thicker and denser on reheating. However, leftovers are still enjoyable and worth keeping. Store them in an airtight container in the fridge for up to three days.
When reheating, add a generous splash of water, broth, or milk to the pasta to loosen the sauce, which will have thickened considerably in the fridge. Reheat gently in a pan over low to medium heat, stirring regularly and adding more liquid if needed, until the pasta is warmed through and the sauce is flowing again. You can also microwave it in a covered bowl with a splash of liquid in one-minute intervals, stirring between each. Do not reheat on high heat or you risk the sauce splitting and becoming greasy.
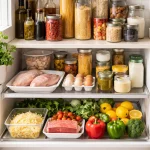
A genuinely useful tip for busy weeks is to make the butternut squash sauce ahead of time on its own. Roast the squash, blend it, and store the sauce in an airtight jar or container in the fridge for up to four days or in the freezer for up to three months. On the evening you want to eat, cook the pasta, brown the butter, fry the sage, and pour in the ready-made sauce. The whole thing comes together in under fifteen minutes this way and you still get the full result.
Brown Butter Sage Butternut Squash Pasta with Goat Cheese
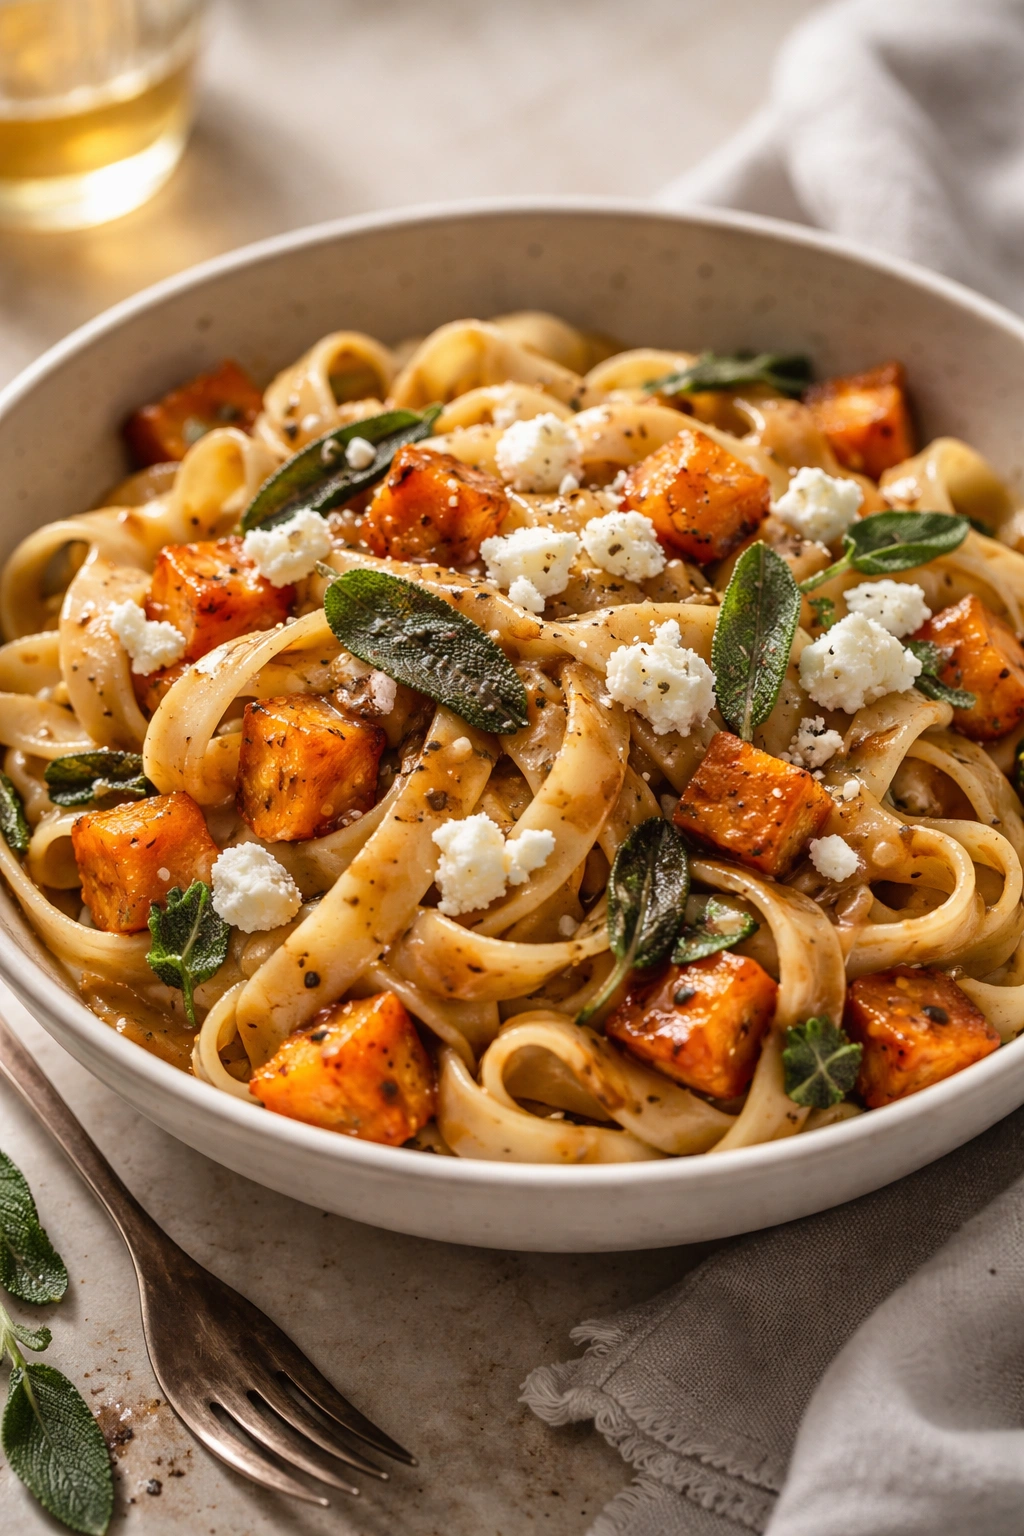
This variation takes the already beautiful classic recipe and adds a tangy, creamy element that creates a genuinely stunning contrast with the sweetness of the roasted squash. Crumbled goat cheese placed over each hot bowl of pasta softens slightly from the heat without fully melting, creating little pockets of cool creaminess and sharp tang throughout every bite that balance the richness of the brown butter in the most satisfying way.
Ingredients
- 400 grams of pasta, pappardelle or rigatoni work especially well here
- 1 medium butternut squash, peeled and cubed
- 100 grams of unsalted butter
- 12 to 15 fresh sage leaves
- 4 cloves of garlic, minced
- 100 grams of soft goat cheese, crumbled
- Half a cup of pasta cooking water
- Quarter cup of freshly grated Parmesan
- 2 tablespoons of olive oil for roasting
- Half a teaspoon of nutmeg
- Half a teaspoon of smoked paprika
- Salt and black pepper to taste
- A generous handful of toasted walnuts for serving
Cooking Method
Follow the complete base recipe method through every step without any changes. The goat cheese and toasted walnuts are added only at the very end when plating. Divide the finished pasta into warm bowls, then crumble the goat cheese generously over the top of each portion. The heat from the pasta will warm the goat cheese just enough to soften it slightly at the edges without melting it completely away. Scatter the toasted walnuts over each bowl, add the crispy sage leaves on top, finish with a drizzle of olive oil and a crack of black pepper, and serve immediately.
Helpful Tips
Toast your walnuts before anything else so they are ready when you need them and have time to cool. Place them in a dry pan over medium heat and shake the pan occasionally for three to four minutes until they smell deeply nutty and have darkened slightly. Toasted walnuts have a dramatically more complex, rich flavour than raw ones and they add a brilliant crunchy contrast to the soft, creamy elements in this bowl. If goat cheese is not to your taste or is difficult to find, soft ricotta is a wonderfully mild and creamy alternative that works beautifully in its place.
Brown Butter Sage Butternut Squash Pasta with Pancetta
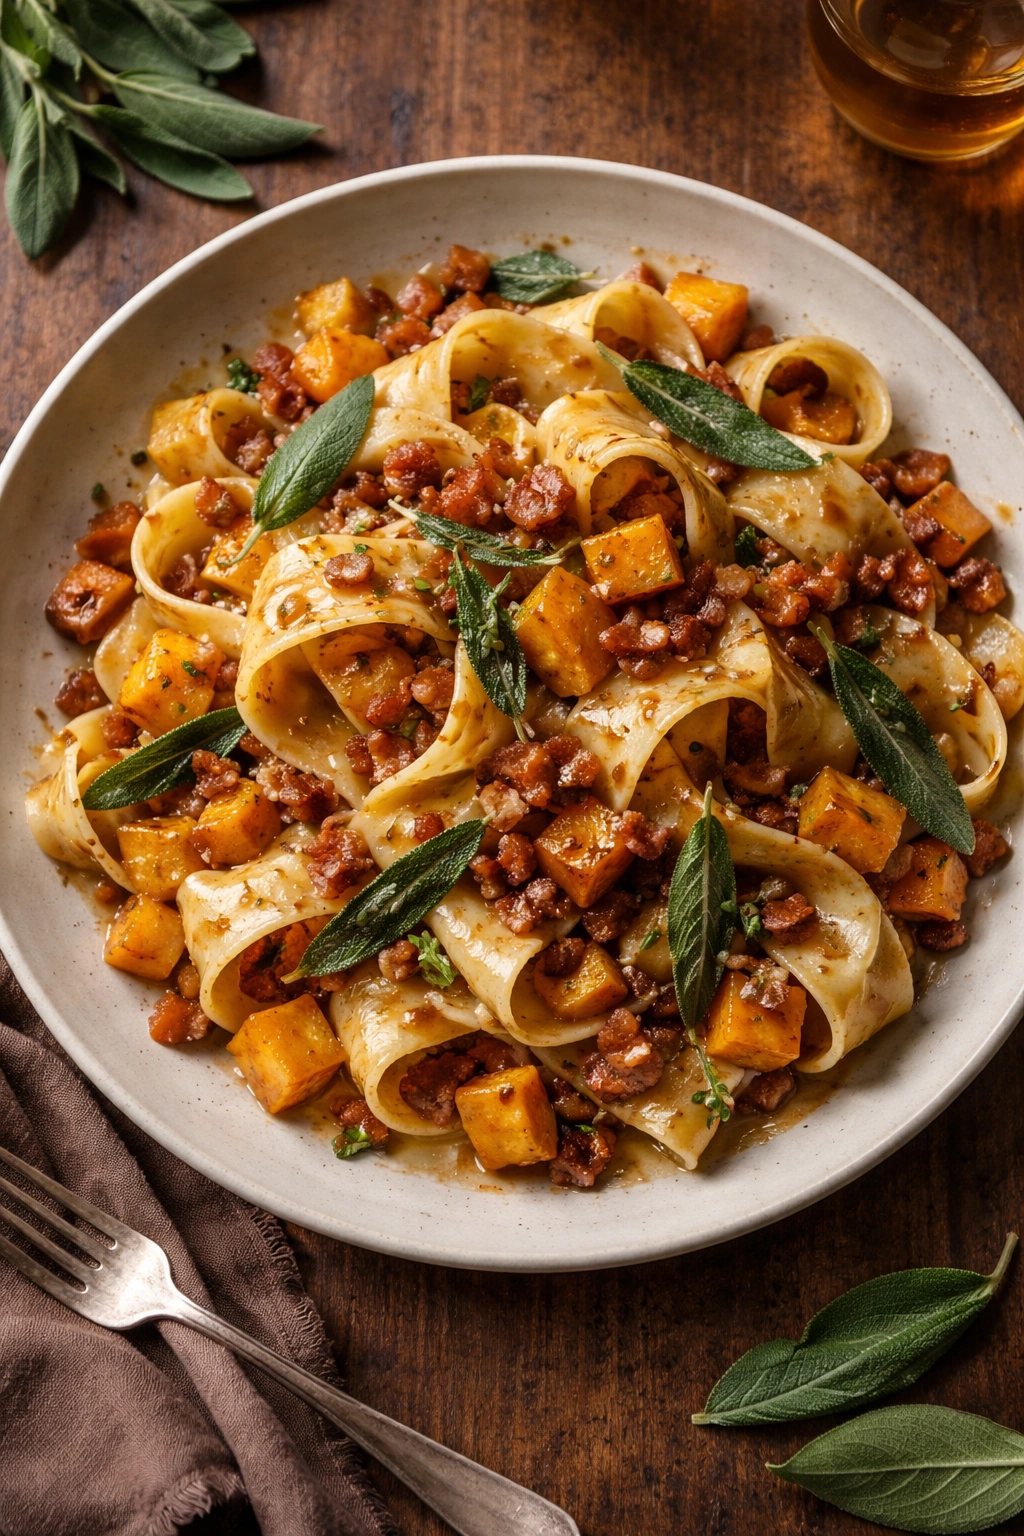
For anyone who wants a meatier, more substantial version of this pasta, adding crispy pancetta is the most natural and delicious way to do it. The salty, smoky, slightly porky flavour of pancetta is a perfect counterpoint to the sweet, nutty, buttery sauce, and the contrast in textures between the crispy meat and the silky pasta is genuinely wonderful to eat.
Ingredients
- 400 grams of pasta
- 1 medium butternut squash, peeled and cubed
- 100 grams of unsalted butter
- 150 grams of pancetta, cut into small cubes or thin strips
- 12 fresh sage leaves
- 4 cloves of garlic, minced
- Half a cup of pasta cooking water
- Half a cup of freshly grated Parmesan
- 2 tablespoons of olive oil for roasting
- Half a teaspoon of nutmeg
- Salt and black pepper to taste
Cooking Method
Before you start anything else, cook your pancetta in a dry pan over medium-high heat, stirring occasionally, until it is golden, crispy, and has rendered out most of its fat. Remove it with a slotted spoon and set it aside to drain on paper towel. Leave the rendered fat in the pan and use it as the base for your brown butter. Adding the butter directly to the pancetta fat means the brown butter will take on a subtle, smoky depth from the pork fat that works through the entire sauce in the most delicious way. Follow all remaining steps of the base recipe exactly. When serving, scatter the crispy pancetta pieces generously over each bowl alongside the sage leaves and Parmesan.
Helpful Tips
Because pancetta is already seasoned and quite salty, taste your sauce carefully before adding any additional salt. The pancetta fat rendered into the brown butter will also season the sauce from within, so you will likely need less extra salt than in the classic version. If you cannot find pancetta, diced streaky bacon is a very good substitute and gives a similar result. Smoked bacon in particular adds an extra dimension of smokiness that pairs beautifully with the nutmeg and sage in this dish.
Brown Butter Sage Butternut Squash Pasta with Ricotta
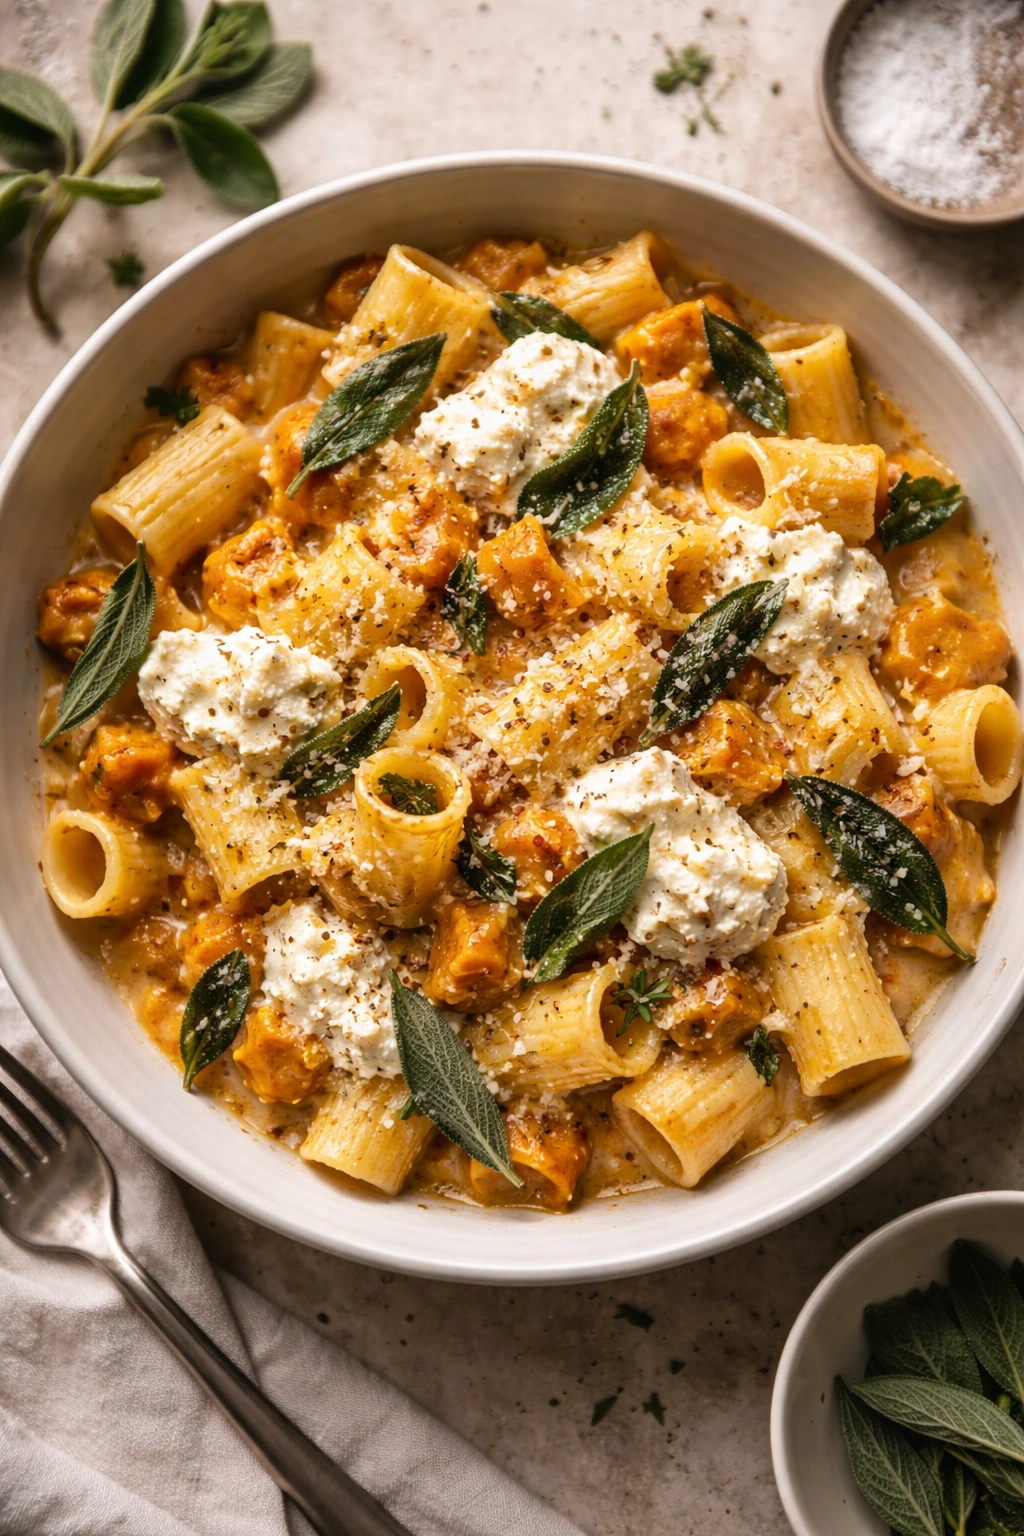
This is the version for people who want maximum creaminess and a gentle, soft flavour that feels comforting and pillowy in every bite. Stirring fresh ricotta directly into the warm squash sauce creates a texture that is incredibly smooth and velvety without the heaviness of actual cream. The ricotta also adds a very mild natural sweetness that complements the roasted squash in a way that feels thoughtful and harmonious.
Ingredients
- 400 grams of pasta, rigatoni or penne work especially well here
- 1 medium butternut squash, peeled and cubed
- 80 grams of unsalted butter
- 150 grams of fresh ricotta
- 12 fresh sage leaves
- 4 cloves of garlic, minced
- Half a cup of pasta cooking water
- Quarter cup of freshly grated Parmesan
- 2 tablespoons of olive oil for roasting
- Half a teaspoon of nutmeg
- Zest of half a lemon
- Salt and black pepper to taste
Cooking Method
Follow the base recipe all the way through to Step 6 where you add the blended squash sauce to the pan with the brown butter and garlic. At this point, add the ricotta to the pan along with the squash sauce and stir everything together gently over low heat until fully combined into a pale, creamy, unified sauce. Add the lemon zest at this stage and stir it through. The brightness of the lemon zest cuts through the richness of the butter and ricotta and lifts the entire dish without making it taste of lemon. Continue with the remaining steps as written, finishing with crispy sage, Parmesan, and a final small grating of extra lemon zest over each bowl.
Helpful Tips
Use fresh ricotta rather than the firmer, drier variety that sometimes comes in a solid block. Fresh ricotta has a much softer, almost spreadable texture that blends smoothly into the sauce without leaving any grainy quality behind. If your ricotta feels a little thick or grainy, beat it briefly with a fork before adding it to the pan to smooth it out first. Do not leave out the lemon zest in this variation. It does quiet but important work in the dish, preventing the sauce from feeling too heavy and adding a freshness that makes the whole bowl more balanced and enjoyable.
Brown Butter Sage Butternut Squash Pasta with Spinach
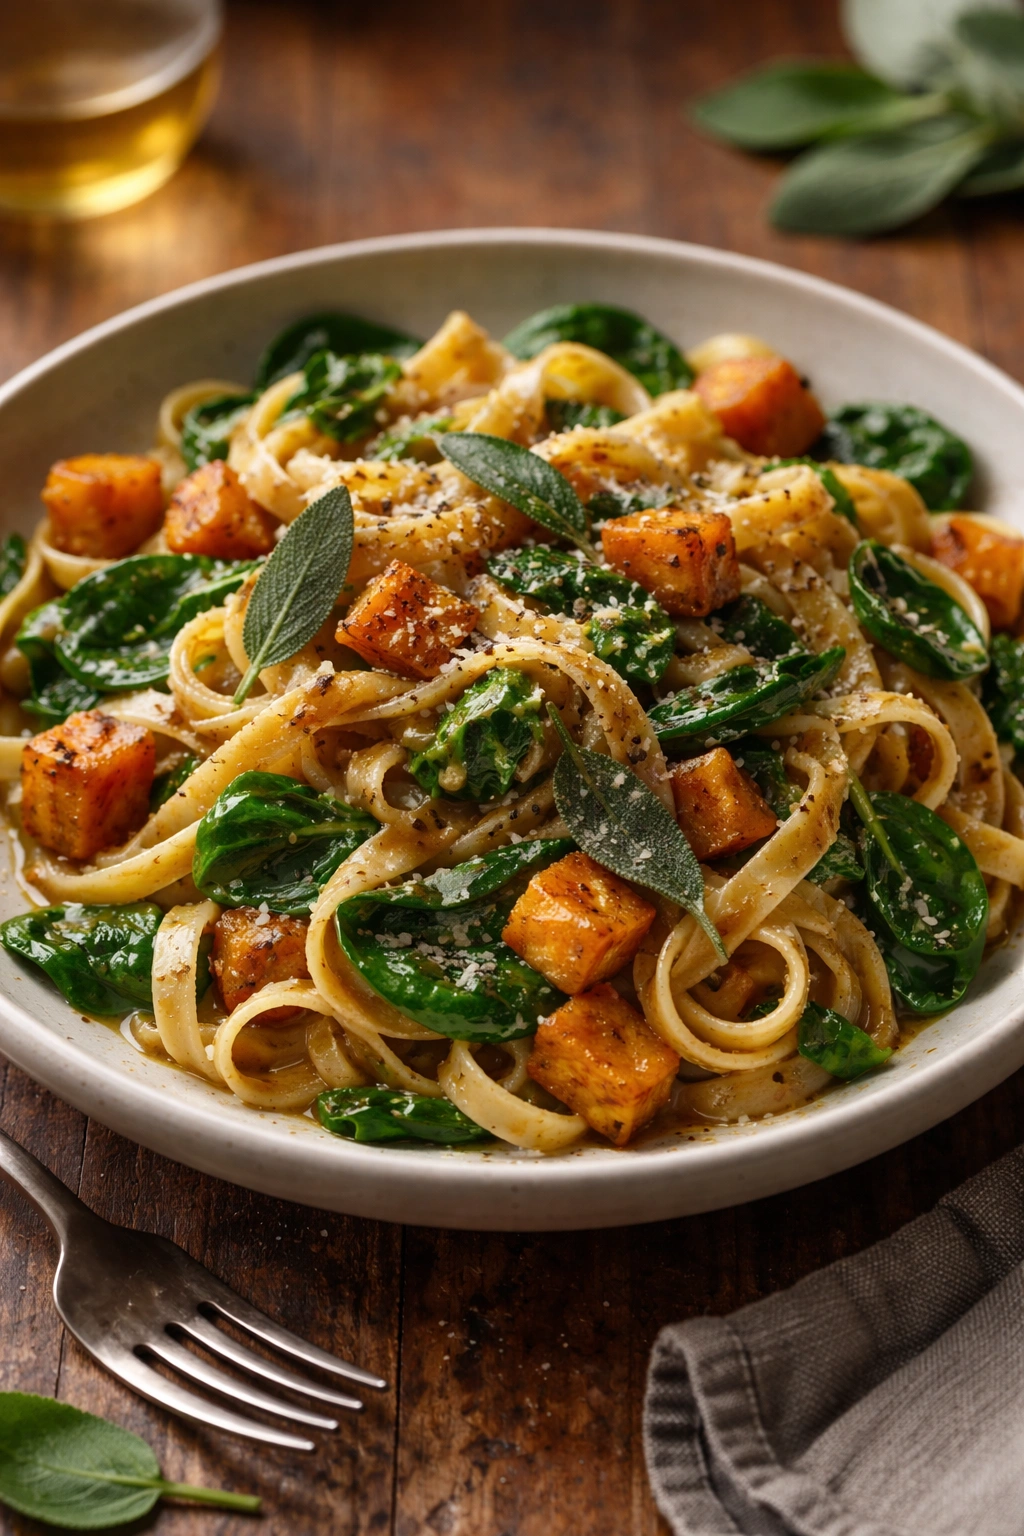
This variation is for people who want to get more greens into the dish without changing the fundamental character of the recipe. A generous amount of fresh baby spinach stirred through the hot pasta at the very last moment wilts almost instantly from the heat and folds beautifully into the sauce, adding colour, nutrition, and a very mild, gentle flavour that supports everything else without competing with it.
Ingredients
- 400 grams of pasta
- 1 medium butternut squash, peeled and cubed
- 100 grams of unsalted butter
- 2 large handfuls of fresh baby spinach
- 12 fresh sage leaves
- 4 cloves of garlic, minced
- Half a cup of pasta cooking water
- Half a cup of freshly grated Parmesan
- 2 tablespoons of olive oil for roasting
- Half a teaspoon of nutmeg
- A pinch of chilli flakes
- Salt and black pepper to taste
Cooking Method
Follow the base recipe exactly through every step. The spinach is the only addition and it goes in at the very end in Step 7 when you are tossing the pasta through the sauce. After adding the pasta and the reserved whole squash pieces and tossing everything together, add both handfuls of baby spinach to the pan and fold them through gently. The residual heat from the pasta and sauce will wilt the spinach fully within thirty to sixty seconds. As soon as it is wilted and bright green, the dish is ready. Plate it up immediately and add the sage, Parmesan, and chilli flakes on top.
Helpful Tips
Baby spinach wilts much more evenly and quickly than regular large-leaf spinach, which is why it is the better choice for this dish. If you only have regular spinach available, roughly chop the leaves before adding them so they integrate more easily and do not leave awkward large pieces sitting in the pasta. Add the spinach at the very last moment just before serving. If it sits in the hot pan for too long after wilting, it will continue to cook, turn dark, lose its vibrant green colour, and become slightly bitter.
Brown Butter Sage Butternut Squash Pasta with Toasted Breadcrumbs
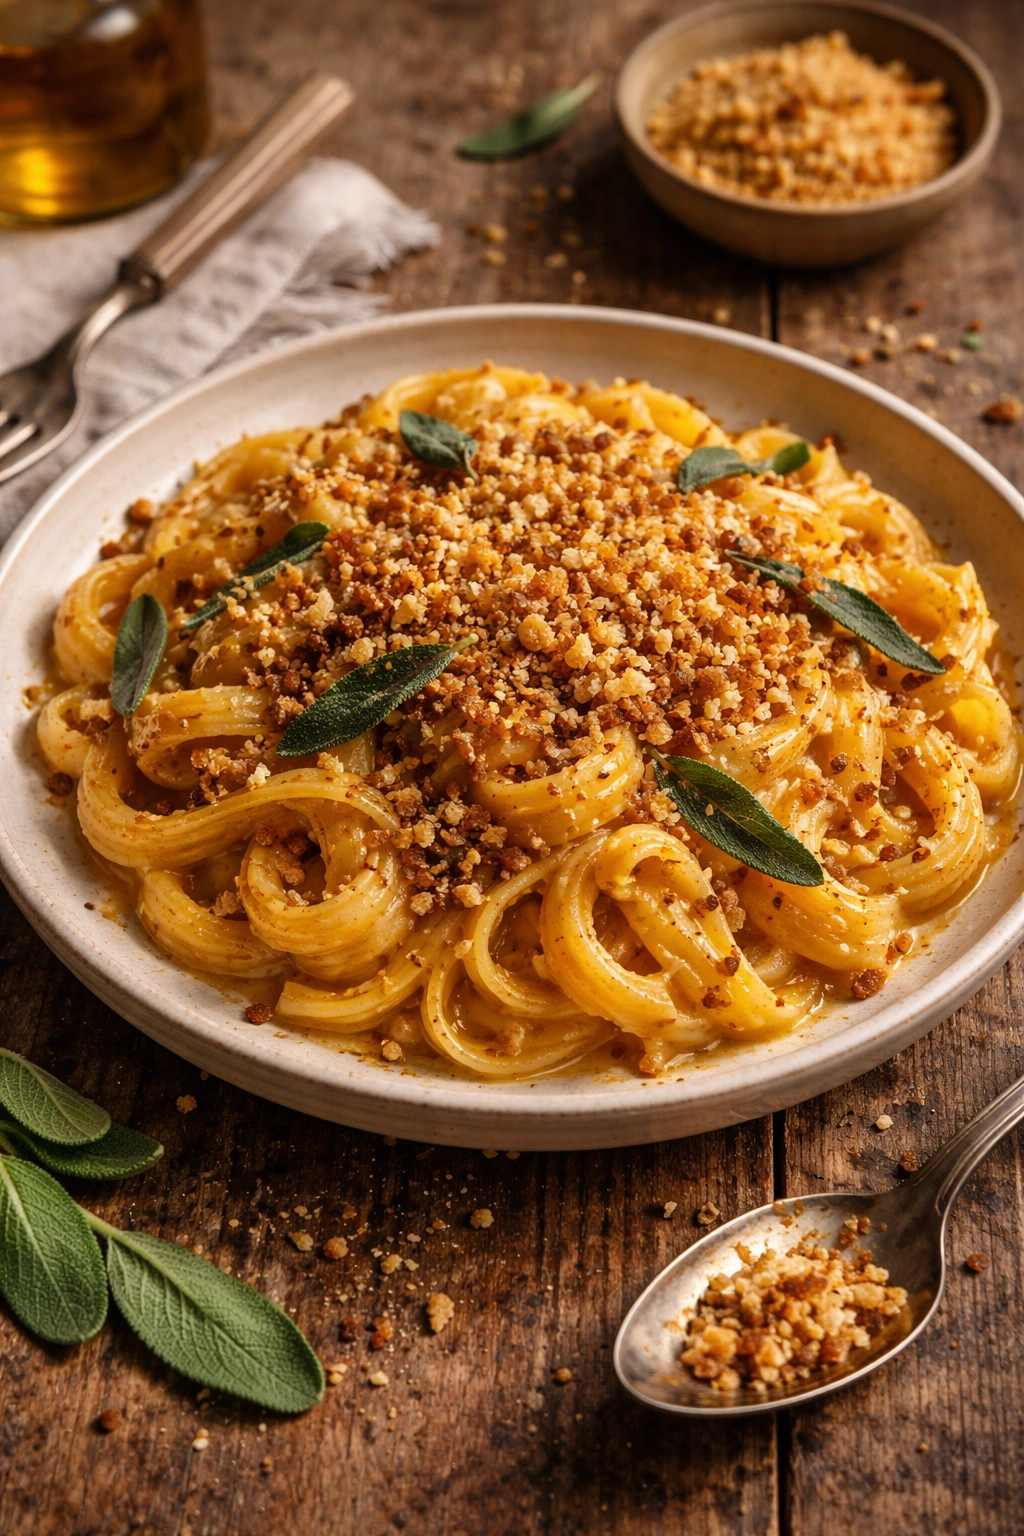
This variation is all about texture. The classic recipe is creamy, silky, and soft throughout. Adding a layer of golden, garlicky, crispy toasted breadcrumbs over the top of each bowl changes the eating experience completely. Every forkful has the contrast of that satisfying crunch against the smooth, velvety sauce underneath, and it is genuinely one of the most enjoyable ways to eat this pasta.
Ingredients
- 400 grams of pasta
- 1 medium butternut squash, peeled and cubed
- 100 grams of unsalted butter
- Half a cup of coarse breadcrumbs, panko or made from blitzed stale bread
- 12 to 15 fresh sage leaves
- 4 cloves of garlic, minced
- Half a cup of pasta cooking water
- 3 tablespoons of olive oil, split between roasting squash and toasting breadcrumbs
- Half a teaspoon of nutmeg
- Half a teaspoon of garlic powder for the breadcrumbs
- Salt and black pepper to taste
- Chilli flakes to taste
Cooking Method
Start by toasting your breadcrumbs before anything else. Heat one tablespoon of olive oil in a small pan over medium heat. Add the breadcrumbs, garlic powder, a pinch of salt, and a pinch of chilli flakes and stir constantly for three to five minutes until the breadcrumbs are deeply golden and smell toasted, nutty, and garlicky. Tip them into a small bowl and set aside. They will stay perfectly crispy at room temperature. Follow the base recipe for all the remaining steps without any other changes. When serving, scatter the toasted breadcrumbs generously over each bowl at the very last second before it goes to the table. Scatter the crispy sage leaves on top as well and finish with a drizzle of good olive oil.
Helpful Tips
The most important rule with the toasted breadcrumbs is to add them at the absolute last second. If they go on even two or three minutes before serving, the moisture from the hot pasta and sauce will begin to seep into them and they will start to go soft. The entire point of this topping is the crunch, so time it correctly and add it right at the moment of serving. Panko breadcrumbs give a lighter, crispier result than regular fine breadcrumbs because they are coarser in texture and have more surface area. If you have a stale end of bread sitting in the kitchen, blitz it quickly in a food processor for homemade breadcrumbs that toast beautifully and taste even better.
Additional Helpful Information About This Recipe
There are a few more things that will genuinely help you get the best result from this pasta every single time you make it.
Choosing the Right Pasta Shape
The shape of the pasta you use in this recipe is not just an aesthetic choice. Different shapes interact with the thick, creamy squash sauce in very different ways and the one you choose will affect how satisfying the dish feels to eat. Wide, flat pasta like pappardelle or fettuccine catches the sauce on its broad surfaces and gives you a generous, well-coated result with every forkful. Tube-shaped pasta like rigatoni or penne traps the sauce inside the tubes so every bite is full of flavour from the outside and the inside simultaneously. Short, ridged pasta like fusilli or conchiglie grips the sauce in its ridges and curves and works extremely well with a thick sauce like this one.
Avoid very thin, delicate pasta like spaghetti or angel hair for this recipe. The butternut squash sauce is thick and substantial, and thin pasta does not hold it properly. The sauce slides off rather than clinging and you end up with an uneven bowl where the sauce pools at the bottom rather than being evenly distributed through the pasta.
How to Fix Brown Butter If It Burns
If your brown butter goes too far and starts to smell sharp and bitter rather than nutty and toasty, the honest answer is that it cannot be rescued. Burnt butter has a genuinely unpleasant bitter taste that will carry through the entire dish no matter what else you add. The only solution is to pour it out, wipe the pan clean, and start again with fresh butter. This sounds discouraging but it genuinely only takes a few minutes to start over, and getting the brown butter right is so central to the quality of this dish that it is worth doing it properly.
To prevent burning, always use medium rather than high heat, always use a light-coloured pan so you can see the colour clearly, and always keep your attention on the pan from the moment the butter goes in. Once the milk solids at the bottom start to turn golden and you can smell the nuttiness developing, the butter is ready within about thirty seconds. Act at that point and you will get it perfect every time.
Making This Recipe Vegan
This pasta can be adapted to a fully vegan version with a few thoughtful swaps that preserve the spirit of the dish without any animal products. Replace the butter with a good quality vegan butter. While it will not brown in exactly the same way as dairy butter, many vegan butters do develop a pleasant nutty quality when cooked, especially the ones that contain coconut oil. You can also deepen the flavour of the vegan butter by adding a small spoonful of white miso paste to the pan along with the garlic, which adds a rich, savoury depth that partially compensates for the flavour lost without dairy butter. Replace the Parmesan with nutritional yeast, which has a naturally cheesy, nutty flavour and is completely plant-based. Use two to three tablespoons in place of the half cup of Parmesan and taste as you go.
Frequently Asked Questions

Can I use pre-cut butternut squash from the supermarket to save time?
Yes, absolutely, and it is a very practical shortcut, especially on evenings when time is tight. Pre-cut squash works just as well as cutting your own. The one thing to be aware of is that pre-cut squash sometimes has more surface moisture than freshly cut squash because it has been sitting. Pat the pieces dry with a paper towel before tossing them in oil and seasoning. This removes that excess moisture and helps the squash roast and caramelise properly in the oven rather than steaming. Also check that the pieces are roughly even in size before they go on the tray, cutting down any that are significantly larger than the rest so everything cooks at the same rate.
What if I do not have a blender to make the sauce smooth?
If you do not have a blender or food processor, you can still make this recipe successfully. After roasting the squash, transfer it to a bowl and mash it as thoroughly as possible with a fork or a potato masher until you have the smoothest texture you can achieve by hand. It will be slightly more rustic and textured than the blended version, but the flavour will be completely identical and many people actually prefer the more rustic, chunky quality because it gives the finished dish a more homemade, hearty character. A hand-held immersion blender is another option that works very well directly in the bowl or the pan without needing to transfer hot squash into a countertop blender.
My sauce came out too thick. How do I fix it?
This is one of the easiest problems to fix in cooking. Simply add more of your reserved pasta water, one tablespoon at a time, stirring between each addition, until the sauce reaches the consistency you want. The starchy pasta water thins the sauce without diluting its flavour, which is exactly what you need. If you forgot to save your pasta water, a small amount of warm water with a tiny pinch of salt will work in an emergency, though the sauce may be slightly less silky in texture. Going forward, always reserve at least a full cup of pasta water rather than just half a cup so you have plenty to work with when adjusting the sauce.
Can I make this pasta for a dinner party?
This is actually one of the best pasta dishes you can choose for a dinner party precisely because so much of it can be done ahead of time. The butternut squash can be roasted and blended into sauce up to two days before and stored in the fridge. The pasta can be cooked to al dente, tossed in a little olive oil to prevent sticking, and stored in a container in the fridge. On the evening of the dinner, all you need to do is make the brown butter, fry the sage, warm the sauce in the pan with the butter, toss the pasta through, and plate up. The whole finishing process takes under ten minutes. Your guests will think you spent the entire afternoon cooking and you can decide how much of that impression to correct.
Is there a nut-free version of this recipe for people with allergies?
The base recipe itself contains no nuts, so it is already nut-free as written. The brown butter has a nutty aroma and flavour that comes from the caramelisation of the milk solids rather than from any actual nuts, so it is completely safe for people with nut allergies. The only variation in this article that includes nuts is the goat cheese version with toasted walnuts, and those can simply be left out without affecting the rest of that variation at all. If you are cooking for someone with a nut allergy, double-check your Parmesan as well since some aged cheeses are processed in facilities that handle nuts, though this is uncommon.
Final Thought
Brown butter sage butternut squash pasta is the kind of recipe that earns a permanent spot in your cooking life almost immediately. It is the kind of dish you make once, genuinely cannot believe how good it is, and then find yourself making again within the same week because you are still thinking about it. The flavour is sophisticated and layered in a way that feels special, but the process is completely manageable for any home cook regardless of experience level.
Whether you go with the simple, stunning classic version or you explore the goat cheese and walnut variation, the creamy ricotta one, the crispy pancetta version, or the crunchy breadcrumb topping, every single option delivers that same golden, nutty, deeply satisfying result that makes this pasta so unforgettable. The core of the dish never changes. It is always built on properly roasted squash, properly made brown butter, and properly fried crispy sage. Get those three elements right and everything else falls naturally into place.
The things to carry with you from this article are simple but important. Watch your brown butter without distraction from the moment it goes on the heat. Give your squash enough space on the tray to roast rather than steam. Save your pasta water before you drain. Season generously at every single stage. Let the pasta rest briefly off the heat before serving so the sauce has a moment to settle and cling. Do all of those things and every version of this pasta will come out absolutely beautiful, every single time you make it. Now go make it tonight, and enjoy every single bite.
Recipes Ideas:
Asian Sesame Noodles Dish
Hey friend, welcome back to my recipe blog! If you are looking for a recip...Instant Pot Beef and Broccoli Recipe
You are about to meet your new favourite weeknight dinner. If you have eve...Quick Dinner Recipes In 20 Minutes
Raise your hand if you have ever come home after a long day, opened the fr...Slow Cooker Chicken and Sweet Potato Curry Meal
Get ready, because this recipe right here is about to become one of the mo...Thai Shrimp Fried Rice Recipe
Today, I am sharing with you a Thai Shrimp Fried Rice recipe that is going...Dirty Rice with Ground Beef Recipe
You know those recipes that sound simple but taste like you spent all day ...Coconut Curry Chicken With Rice Noodles
If there is one recipe that I genuinely get excited about every single tim...